For immediate help, please review our Help Topics below. Or for free, 1 on 1 support, you can contact our support team.
Support
Help Topics
Getting Started
Managing Content
Assessments
Creating & Editing Packs
- Creating a New Pack
- Pack Editor Overview
- Editing Packs
- Adding Existing Content
- Adding Supplemental Content
- Arranging Content
- Cover Options
- Adding Tabs
- Binding Info
- Previewing
- Publishing
Managing Packs
- Overview
- Info & Settings
- Distributing Packs
- Revising
- Withdrawing
- Ordering Printed Packs
- Print Order History
- Downloading
- Copying a Pack
Reports
Managing Accounts
- Creating New User Accounts
- Updating A Profile
- Adding Users to Groups
- Resetting A Password
- Disabling User Accounts
Distributed Materials
- Account Activation
- Accessing Distributed Packs
- Accessing Packs in the Mobile Apps
- Viewing a Pack in the Mobile Apps
- Working with Notes & Highlights on a Mobile Device
- Accessing Packs on a Laptop or Desktop Computer
- Viewing Packs on a Laptop or Desktop
- Working with Notes & Highlights on a Laptop or Desktop
Return to Top
Getting Started
Video Tour
This video provides an introduction to using the platform—for more detailed info, please consult the help topics menu.
Note: The SharedBook platform is highly customizable and the options available to participants may vary depending on assigned role and an organization's platform settings.
Platform Overview
SharedBook's platform makes it easy to assemble, manage and distribute your organization's content—securely.
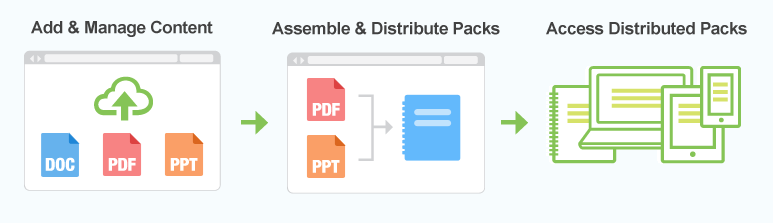
- Add & Manage Content—Upload content to your collection. Powerful organizational features make it easy to find what you need when assembling packs of your content for distribution.
- Assemble & Distribute Packs—Assemble Packs from the content in your collection. Distribute completed packs through the platform via email invitations. Security options allow you to restrict or revoke access to packs that are digitally distributed through the SharedBook platform. Printed copies can be ordered and shipped as needed.
- Access Distributed Packs—Digitally distributed packs can be accessed through a SharedBook web account, and the SharedBook mobile apps. All provide highlighting, note taking, and convenient search options. Printed copies can be ordered by recipients as well.
Accounts and Permissions
Your account, and the options accessible to you in it, will depend on your assigned role. There are five different user roles in SharedBook:
- Administrator—An Administrator can create new users, manage their roles and permissions, add and manage content in the collection, as well as create, edit and distribute Packs.
- Content Manager—A Content Manager can add and manage content items in the collection.
- Pack Manager—A Pack Manager can create, edit and distribute Packs (they cannot add or manage content in the collection).
- Content & Pack Manager—A Content & Pack Manager can add and manage content in the collection, as well as create, edit and distribute Packs.
- Participant—A Participant can receive a Pack, view it, and make notes or highlights. And depending on your organization's platform settings, Participants can purchase printed copies of digitally distributed Packs.
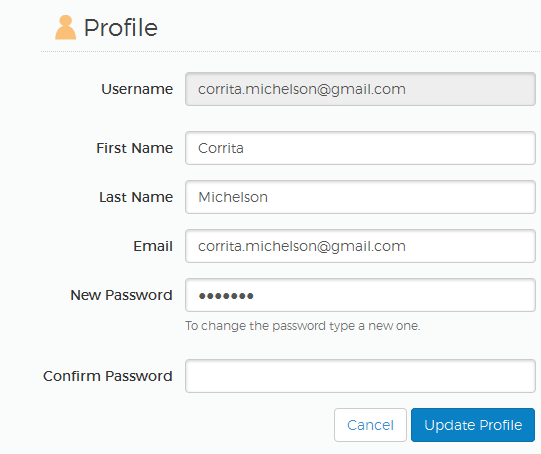
Your Profile
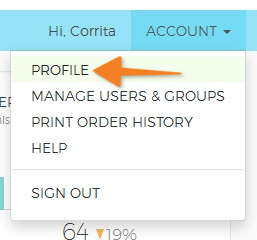
Your profile contains your account's username, your name, email address and password. To access your profile information, open the Account menu, located in the top navigation menu on the right-hand side. In the Account menu, select the Profile option.
With the exception of username and role, you can update your profile information as needed.
 Return to top
Managing Content
Overview
Content can be added to your collection several ways, and once added, can be shared with collaborators and included in packs. In SharedBook, most content management takes place on the Content page—where you can change its name, update it from a newer version on your computer, and change its settings.
Adding New Content
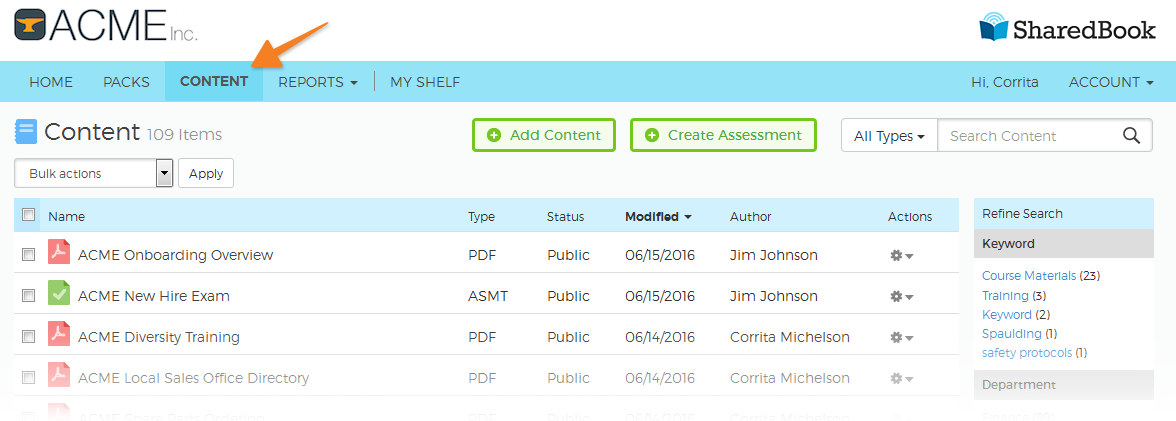
The first step in creating a Pack is adding content items to your collection. You can add content from the Home, Content and Pack Editor screes by using the Add Content option. On the Home page, the Add Content button is located in the Content panel.

On the Content screen, the button appears at the top of the screen toward the right.

The Add Content pop-up window contains options and settings for the files you'll be adding to your collection. Note, the options in this window will vary depending on your organization's platform settings.
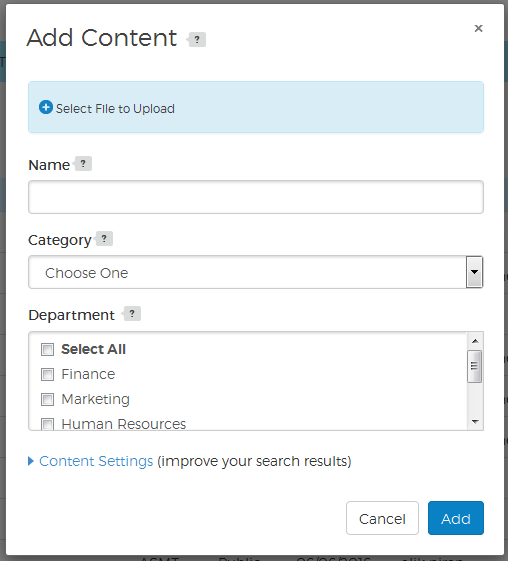
Use the Select File to Upload option at the top of the window to get started—PDFs, Microsoft Word documents, and Microsoft PowerPoint documents are supported, along with JPG and PNG images. The name of your selected file will appear in the Name field, but you can re-name it if you like (the Name appears in a Pack's Table of Contents). Depending on your organization's platform settings, you may have additional fields like Category or Department, these options help organize and control access to the content.
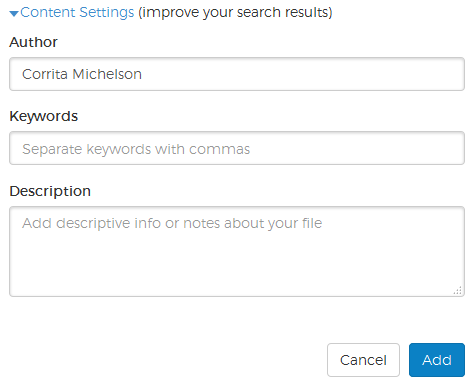
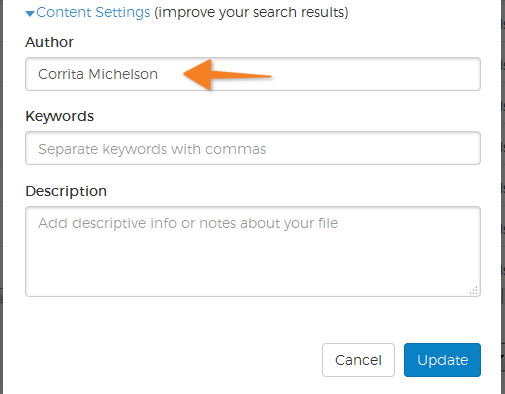
Expand the Content Settings section of the pop-up window, for additional options. The Author field is pre-populated with your name, but can be changed for instances where others' work is being uploaded and published. The remaining fields, Keywords and Description, can make finding your content a breeze in a crowded collection—your keywords will appear in the sidebar in the Content Collection, creating a convenient virtual folder of items.
Once you've entered the desired information for this content, click the blue Add button and your content will appear in your collection.
Content Info & Settings
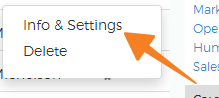
It's easy to update content info and settings—go to the Content page and locate the item you want to update. Open the Actions menu and select the Info & Settings option.
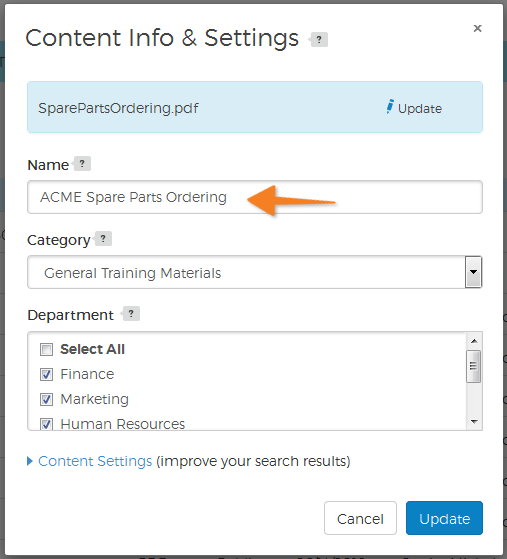
The Content Info & Settings pop-up window provides options for updating the content file and the information and settings related to it. Note, the options in this window will vary depending on your organization's platform settings.
Update Content File
You can upload a new version of a file and keep all of the file's info and settings the same by selecting the Update option to the right of the file name in the blue container at the top of the window. Uploading a new version of the file will not change the version of the file in any packs it has been included in previously.
Content Name
The name of your content can be changed in the Name field.
Content Settings Section
Expand the Content Settings section at the bottom of the window to access the Author, Keywords and Description fields. Entering Keywords and a Description can make finding your content a breeze in a crowded collection—your keywords will appear in the sidebar on the Content page, creating a convenient virtual folder of items.
After completing your changes, click the blue Update button to save them.
Return to topSearching for Content
There are several handy locations to search your Content Collection from. On the Home Page you can search from the Getting Started section at the top of the page, or you can use the search box in the Content section at the bottom of the page.
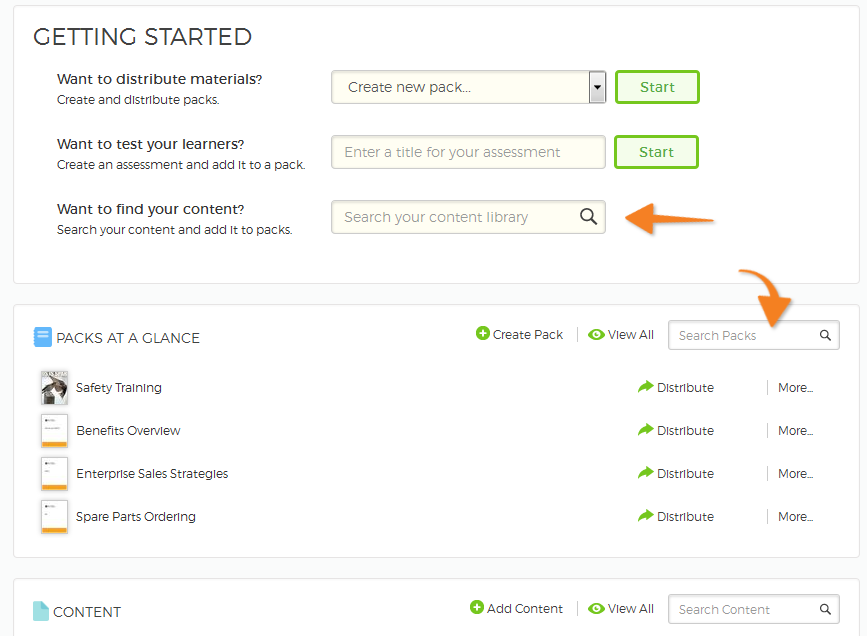
If you're on the Content page, you can also search for content using the search box in the upper right of the page.

This search box lets you narrow your search by giving you the option to search specifically by Keyword, Title or Author Name.
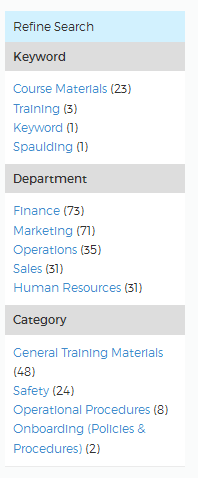
You can also find content using the filters available on the right-hand side of the Content page. Each filter shows you how many content items it contains—select a filter to view all of those items. When you add files to your collection, enter Keywords into the keyword field and those keywords appear in this sidebar, creating a convenient virtual folder of items.
 Return to top
Assessments
Overview
Assessments allow you to gauge your participants' engagement and understanding of your content. In the SharedBook Platform, assessments are a type of content that you can author, and like other collection content, they can be added to packs. The Assessment Editor provides a wide range of question types from very simple multiple choice or essay questions, to more complex question types with math equations or fill in the blank options.
Creating Assessments
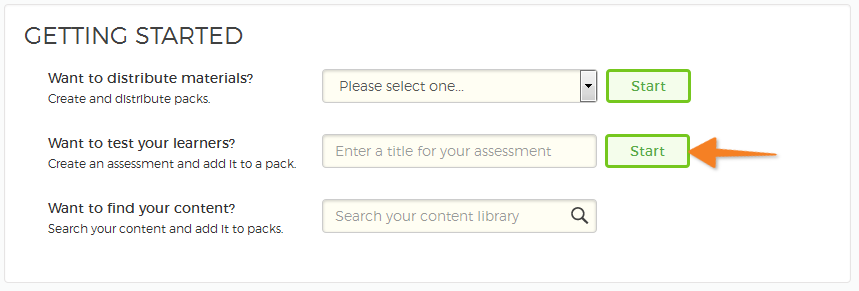
You can start creating an assessment right from the Home page. Just enter the name of the assessment in the field labeled "Want to test your learners? Create and assessment and add it to a pack."—then click the Start button.
You can also create a new assessment from the Content screen by clicking the Create Assessment button on the top right.

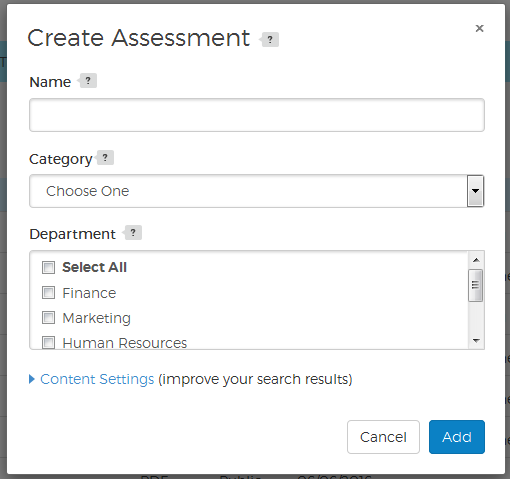
This will open the Create Assessment pop-up window where you can give the assessment a Name (which will appear in your pack's table of contents). Depending on your organization's platform settings, you may have additional fields in this dialog like Category or Department, these options help organize and control access to the content.
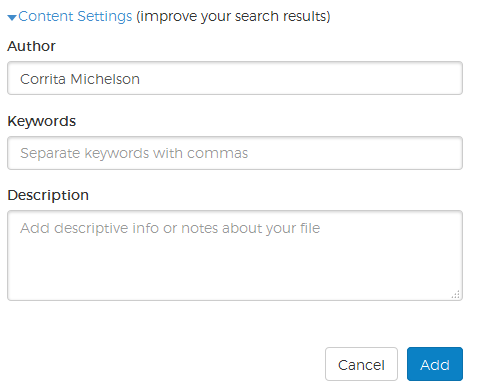
Expand the Content Settings section of the pop-up window, for additional options. The Author field is pre-populated with your name, but can be changed for instances where others' work is being uploaded and published. The remaining fields, Keywords and Description, can make finding your content a breeze in a crowded collection—your keywords will appear in the sidebar on the Content page, creating a convenient virtual folder of items.
Once you've entered the information, click the blue Add button. This adds the assessment to the collection and launches the Assessment Editor.

Editing Assessments
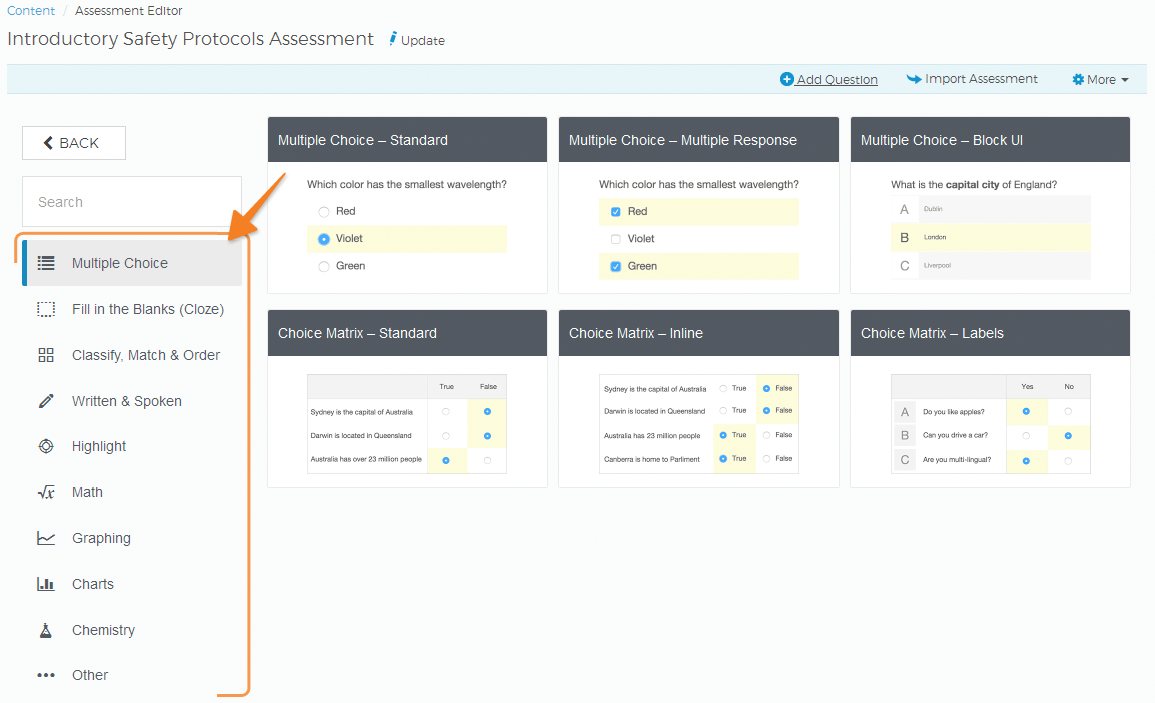
To begin authoring an assessment, select the Add Question option that appears on the toolbar below the assessment name. This reveals a screen with a variety of question types to choose from (multiple choice, fill in the blank, etc.)
Once you've selected a question format, you can then pick the specific options and settings for your question.
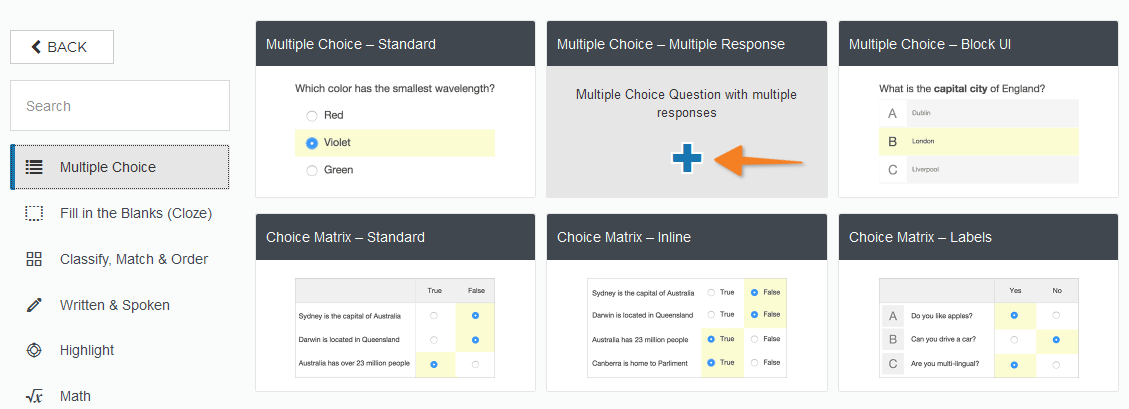
Each question format has different options and settings, but all formats allow you to enter the question and potential answers.
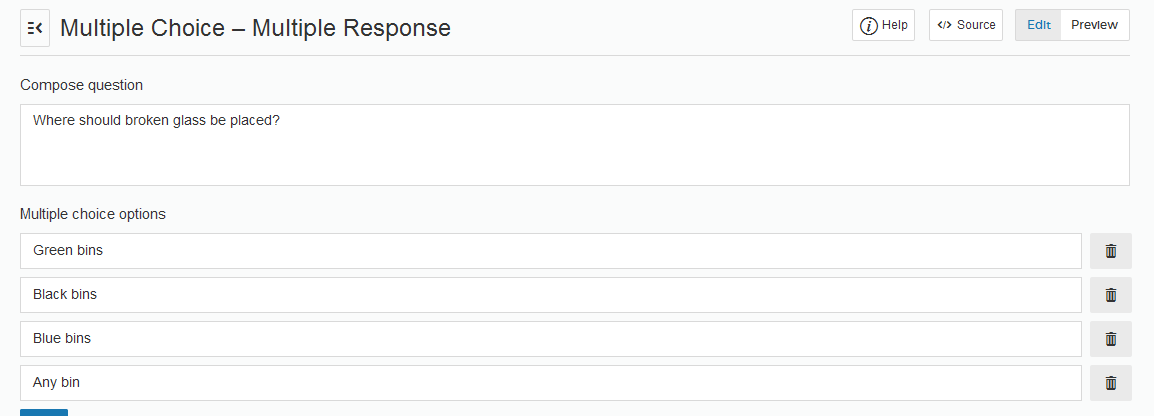
Further down the page there are options to select how many points a question is worth and identify the correct answer(s) to your question.

Expand the More Options section to further customize the question. When you're done, click the Save button at the top of the question section on the right.

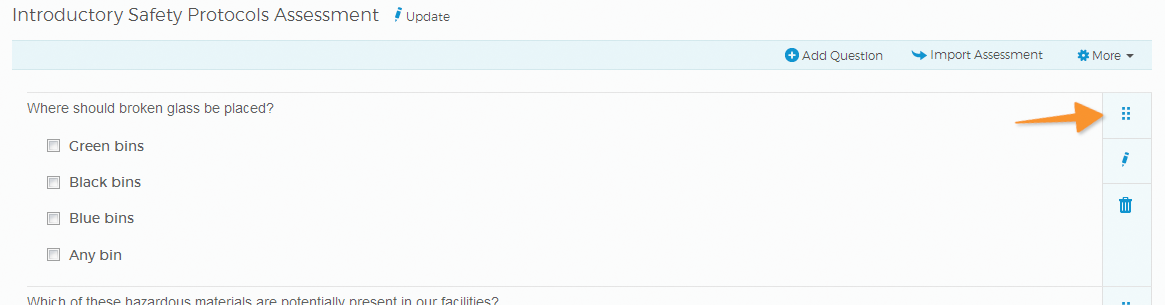
After each question is added, you'll see them presented as a participant would view them. To the right of each question there are three controls that allow you to move, edit or delete the question.
The Move icon (six dots) is first, and can be used to select and drag a question into a different location in the assessment.
The Edit icon (a pencil) can be clicked to edit the question's options and settings.
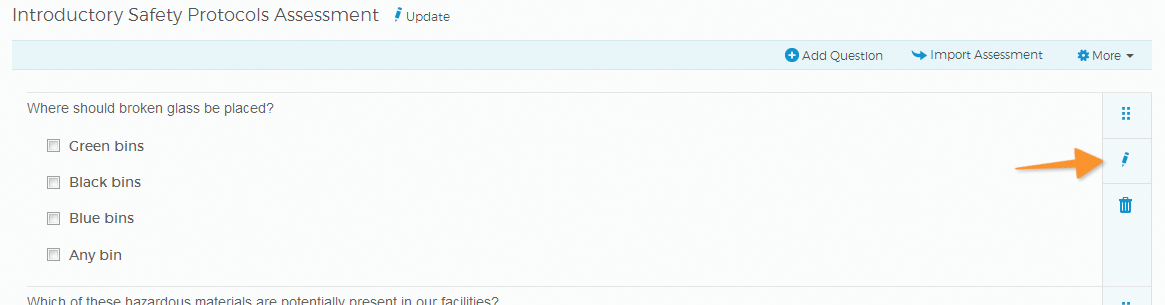
The Delete icon (a trash can) can be selected to delete the question.

Importing Assessments
The Import Assessment option appears in the toolbar above the question area—use it to add questions from another assessment in your account. After selecting the Import Assessment option a pop-up window opens containing a list of your assessments— select one or more to import.
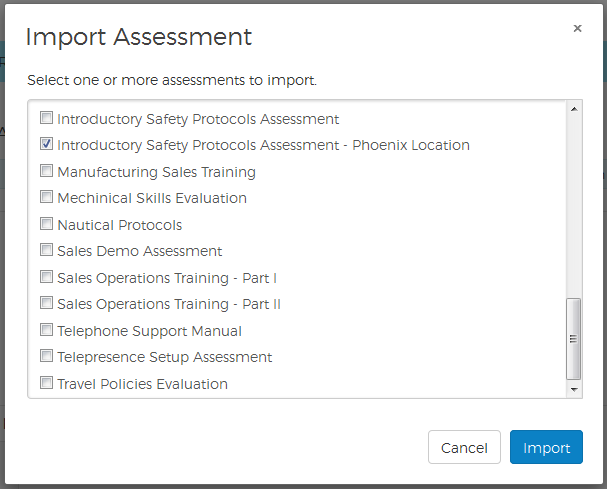
You can delete, edit or re-arrange any of the imported questions. Any changes you make to imported questions will not affect the assessments you imported them from.
Adding Assessments to Packs
Assessments are a type of content in SharedBook and can be easily added to your pack in the Pack Editor. Create a new pack or go to the Packs page and select the Edit option in the actions menu of an existing pack. In the Pack Editor, locate your assessment in the Content Collection panel on the left where all of your content is displayed—use the Add option to the right of the assessment name and it will appear at the end of your pack contents on the right. Re-arrange it as you would any other content item by dragging it to the desired location. For more on editing pack contents, view the Pack Editing section of this guide.
Return to topCreating & Editing Packs
Creating a New Pack
A "Pack" can contain one or more content items. Create new packs right from the Home page's Getting Started panel. The first option is labeled "Want to distribute packs? Create and distribute packs."—click the dropdown menu and select the first option in the list, "Create a new pack", then click the Start button. You can also use the Create Pack option at the top of the Packs at a Glance panel, below the Getting Started panel.
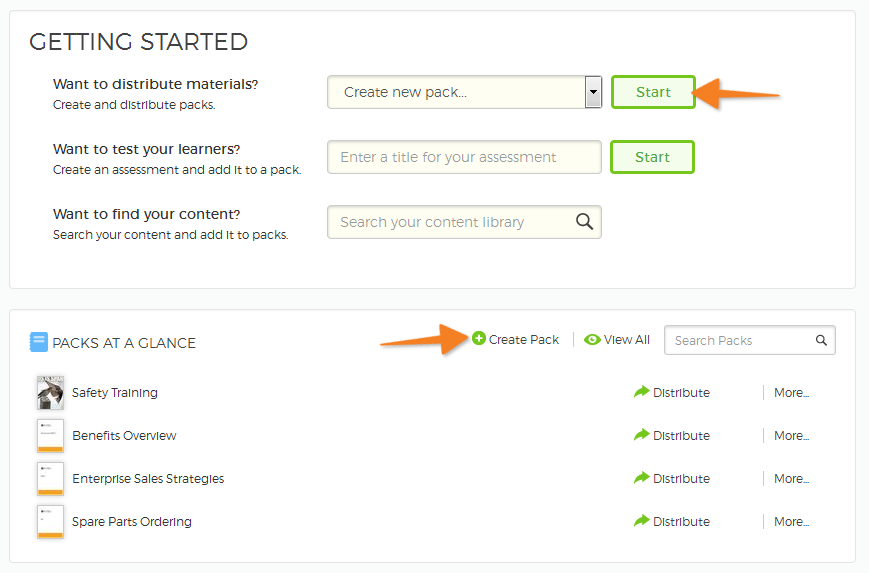
You can also create a new pack from the Packs page by clicking the Create Pack button in the upper right.

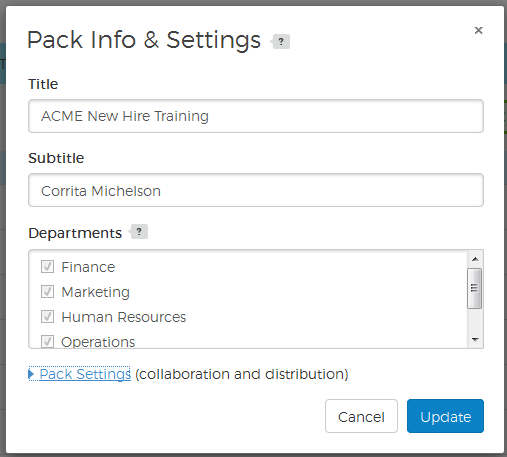
You'll need to give the pack a name, owner and, depending on your organization's platform settings, you might also have to choose access settings as well.

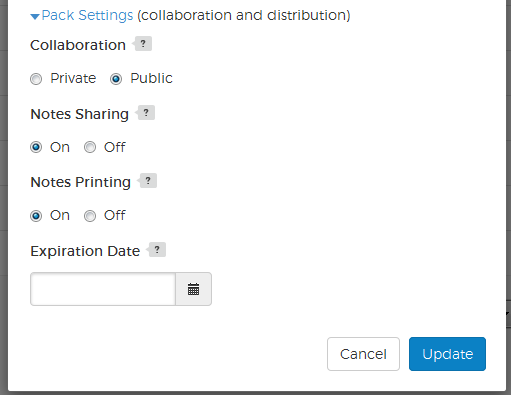
Expanding the Pack Settings section reveals additional collaboration and distribution options. For easy collaboration with others in your organization, the Public option will make your pack both visible and editable by others in your organization. If you want to work on a pack before sharing it with others, select the Private option.
You can restrict note printing and exporting on digitally distributed packs by selecting the Off option for both the Notes Sharing and Notes Printing settings.
To create an expiration date for digitally distributed packs, so that recipients will not be able to access it after a specified date, simply enter a date in the Expiration Date field—this is helpful for materials that are likely to become outdated.
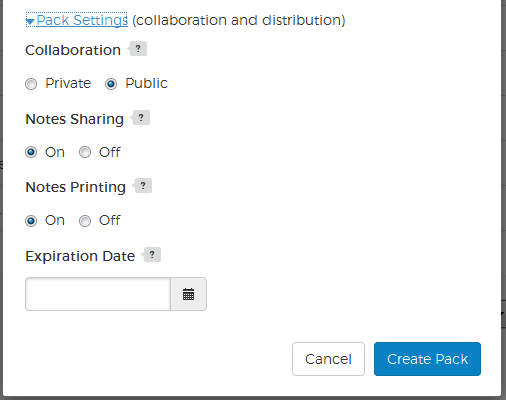
When you're done, click the blue Create Pack button—this saves your pack and launches the Pack Editor.
Return to top
Pack Editor Overview
The Pack Editor has all of the options and settings you'll need to prepare your pack for publication and distribution.
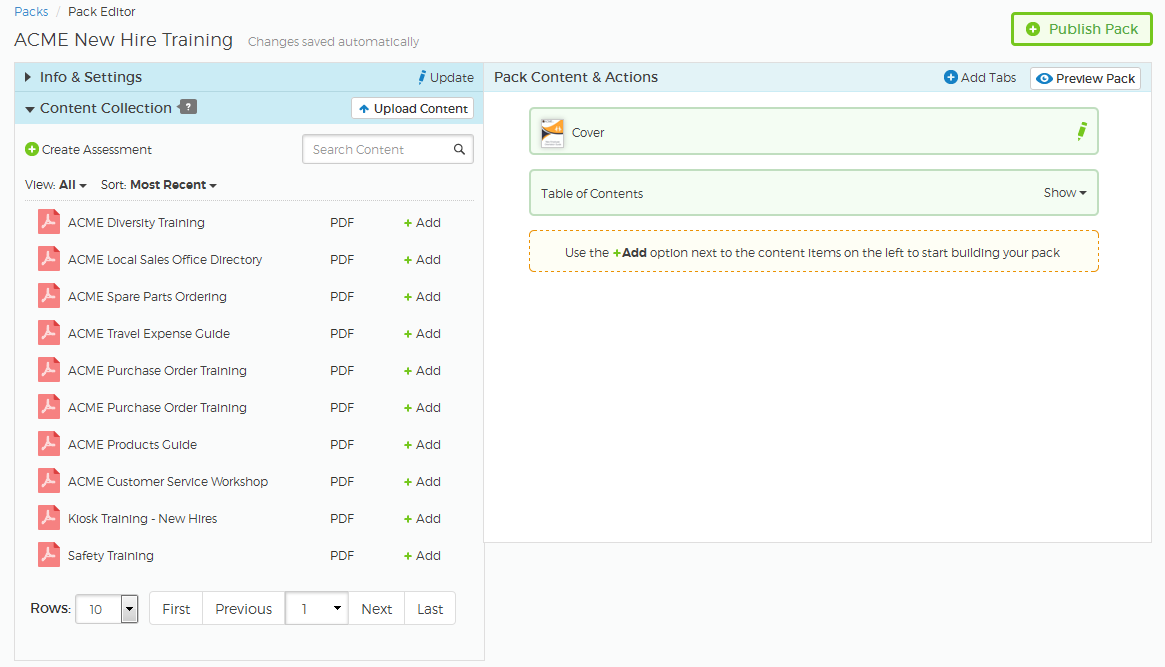
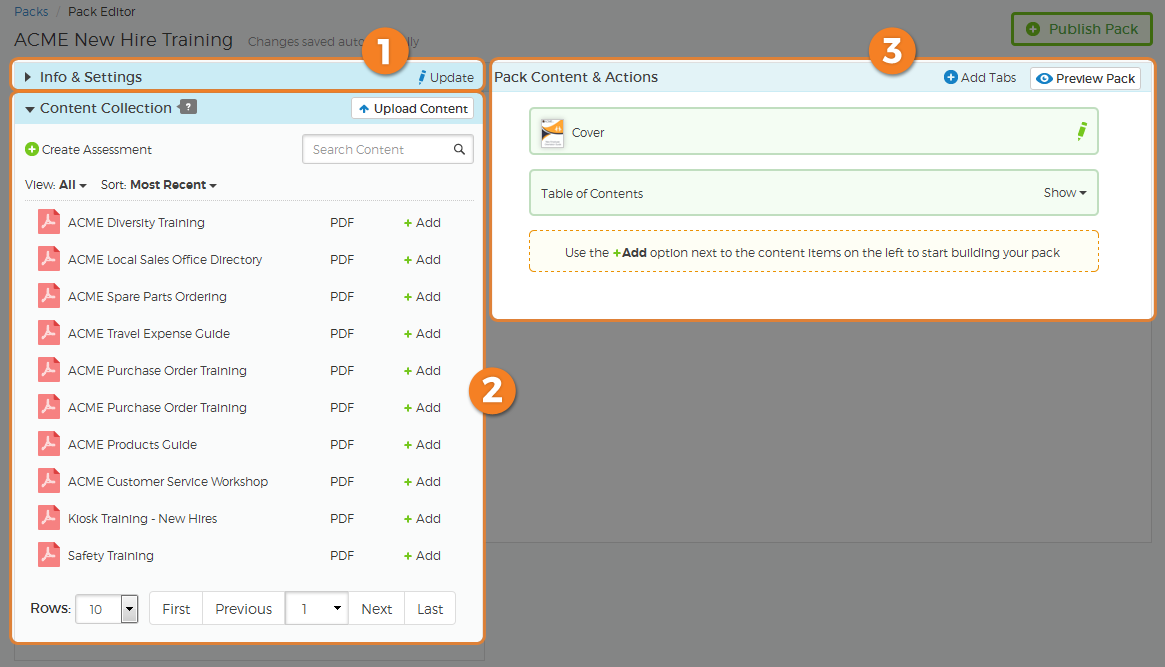
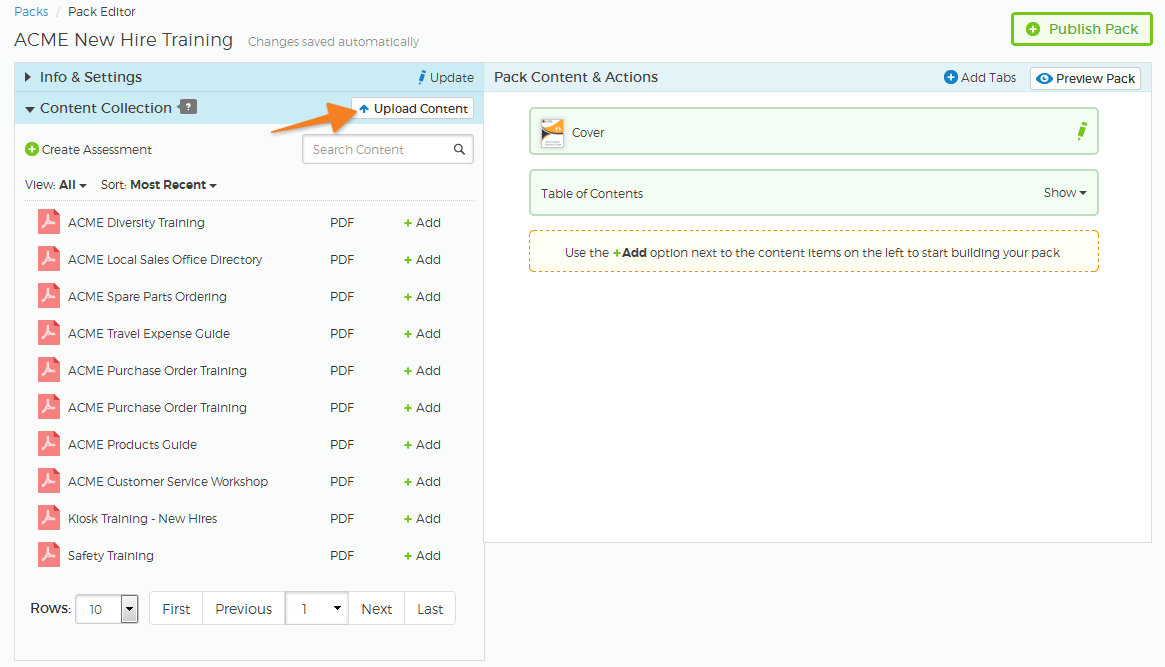
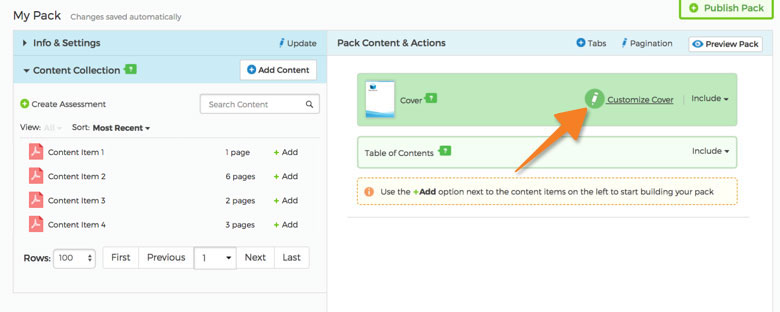
The pack editing controls are arranged in three panels, with the Publish Pack option on the upper right. Each is highlighted and marked with a number in the image below.
- 1–Info & Settings: This panel contains your pack info and access settings. Select the Update option on the right side of the panel heading to make desired changes.
- 2–Content Collection: In this panel you'll see the content in your collection with an Add option next to it that you'll use to add items to your pack. There are also options for finding content, uploading new content and creating an assessment.
- 3–Pack Contents & Actions: As you add items from the Content Collection panel, they will appear here in the order they're added and can be re-arranged by dragging and dropping them where you'd like.
 Return to top
Editing Packs
Content can be added to packs in one of two ways; you can choose content already added to SharedBook or you can upload new content directly to the pack. You can also add a new assessment by selecting the Create Assessment option.
Return to top
Adding Existing Content
To use existing content from the collection, select content items from the Content Collection panel by clicking the Add option to the right of each item. The item will be added to the Pack Contents panel on the right. Each newly added item will appear after the previously added item, and can be re-organized by dragging it to the desired location in the pack.

Adding Supplemental Content
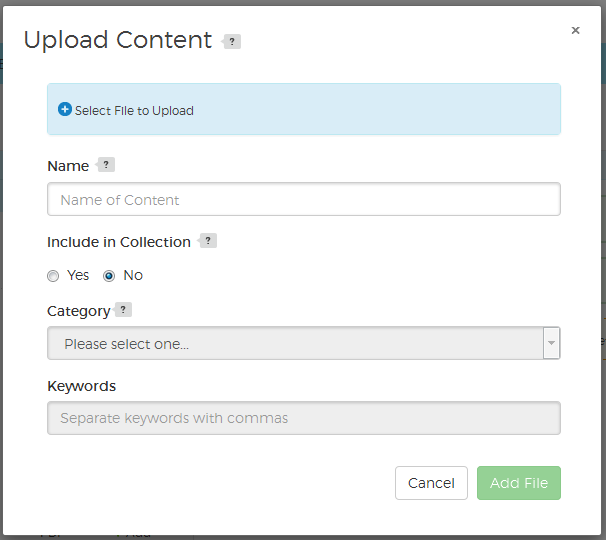
You can add new content to a pack that's not already in SharedBook by clicking the Upload Content button.
Select the file you want to upload (PDF, Microsoft Word, Microsoft PowerPoint, JPG image of PNG image). You can opt to make this new content part of the Content Collection, or only use it in this pack; if you opt to include it in the collection you can select categories and assign keywords for this new content (content settings options may vary, depending on your organization's platform settings).
 Return to top
Arranging Pack Contents
Each pack consists of a cover, table of contents and the content you add.
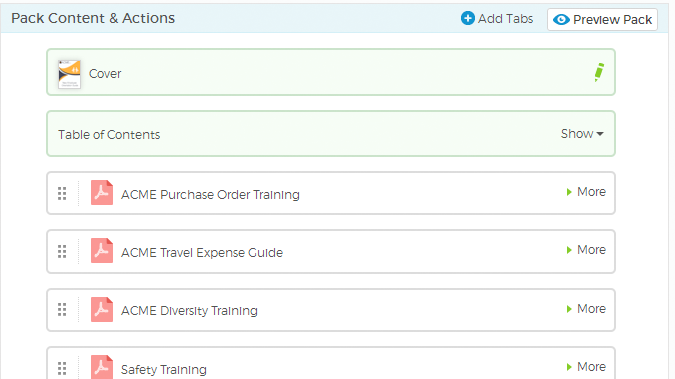
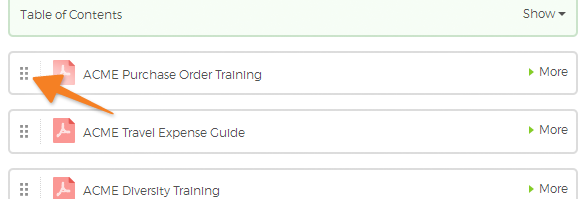
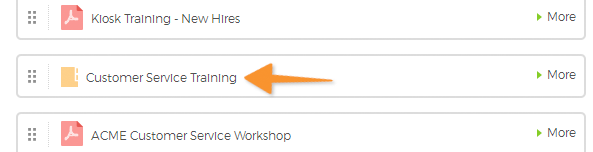
You can re-arrange added content by clicking on the Move icon to the left of each content item and dragging it to the desired location.
You can also view or remove added content by clicking the More option to the right of each content item container and selecting Remove or View.

The table of contents is automatically generated and is shown in the final pack by default. If you don't want the pack to include the table of contents, just click the Show display option on the right of the table of contents container and choose the Hide in distributed packs option.
 Return to top
Cover Options
You can change the pack's cover by clicking the green edit icon (a pencil) to the right.

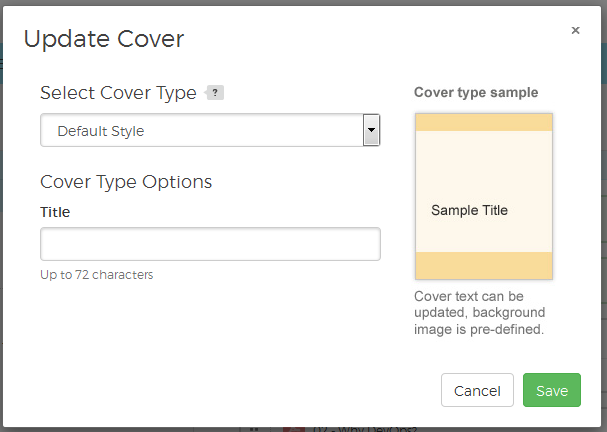
This will open a pop-up window where you can input the displayed title and select from the available cover options.
- Default Style: This style provides the option to edit the title that appears on the pack cover. By default the title is the same as your pack's name, changing the title that appears on the cover of the pack will not change your pack's name (you can change the pack's name in the pack's Info & Settings dialog). For the Default Style, the cover background image is pre-defined as part of your organization's platform setup.
- Text and Background Image: This option allows you to edit the title, and to upload a custom cover image. For the best results, the background image size should have a width of at least 2800 pixels and a height of at least 3600 pixels (for a resolution of 320 dpi). If your image is not to size, it will be auto-adjusted.
- Background Image Only: To display just a background cover and no title, select this option and upload your custom cover.
 Return to top
Adding Tabs
For longer packs, add tabs to divide them into sections. In printed packs, tabs are affixed to an inserted page and they jut out from the rest of the sheets. In digitally distributed packs, like articles, tabs appear in the table of contents as active links and can be used to easily navigate to pack sections. To insert a tab, click the Add Tabs option in the upper right side of the Pack Contents & Actions panel.

Enter the text you want to appear on the tab in the pop-up window.
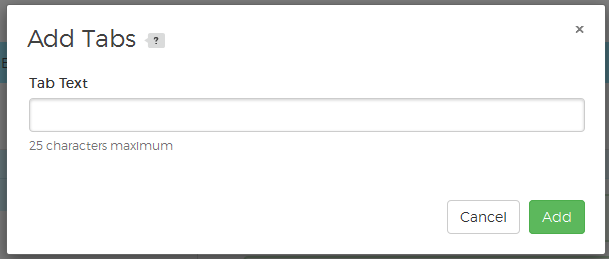
New tabs are added to the end of the pack. Just click and drag it to the appropriate location.
 Return to top
Binding Info
There are several binding types available for printed packs—two in particular require special attention to ensure success, Binders and Saddle Stitch. Read the sections below for full details.Binder Instructions
In order to be processed successfully, your binder needs to be set up in a specific way in the Pack Editor, and include special files. All of the items linked to in the list below must be formatted correctly to ensure success. While none of the steps are complex or long, they do need to be followed closely.
- Binder Cover (Binder Cover Insert) Upload
- Table of Contents Setting
- Spine File Upload and Placement
- Interior Cover Page Placement
- Pack Info & Settings Binder Selection
Binder Cover (Binder Cover Insert) Upload
To specify the cover that will appear on the front of the Binder (slipped into the plastic cover and visible on the front when the binder is closed).
- Open the pack you are printing in the Pack Editor. If you're just starting out and don't have a pack yet, use the Create Pack option on the Home or Packs pages to create a new pack and enter the Pack Editor automatically.
- In the Pack Editor, select the Customize Cover option in the Cover panel. It's in the first panel of the Pack Content & Actions area on the right.
- In the Customize Cover dialog, upload your cover PDF.
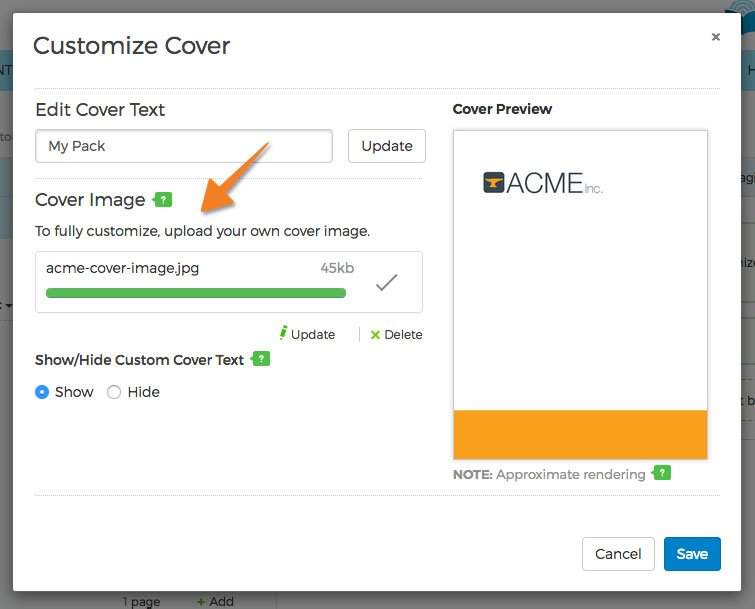
- In the Show/Hide Custom Cover Text section, click Hide to hide the system generated cover text.
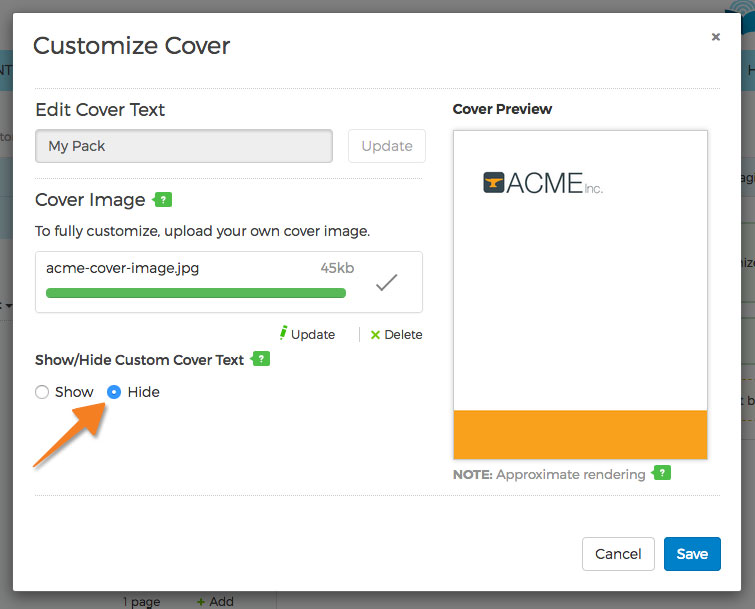
- When you're finished, click Save.
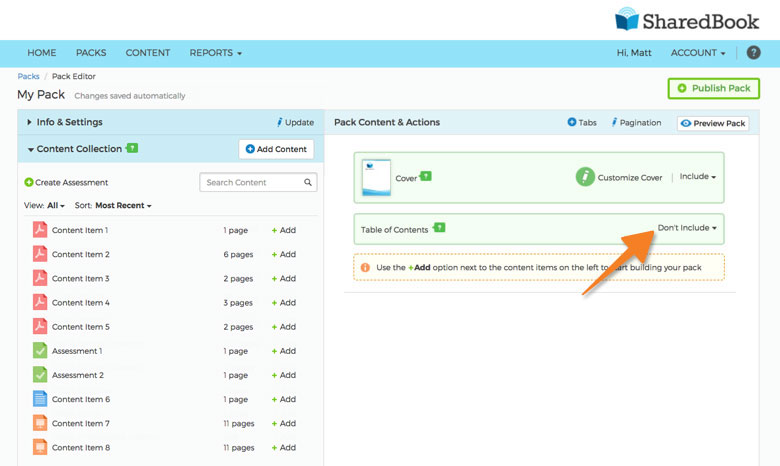
Table of Contents Setting
Packs with the Binder binding type must not include an auto-generated Table of Contents.
- In the Table of Contents panel, select the Don't Include option. It's in the second panel of the Pack Content & Actions area on the right.
Spine File Upload and Placement
Packs in Binders must include a spine file as the first item of content in the pack. Follow the directions below to add your spine file.
- To begin, you'll need a properly formatted spine file—download our template or use the following specifications to create one. Please note that the file must contain cropmarks.
Resolution: 300dpi
Dimensions: Width, 1in.; Height, 11in.
Cropmarks: Length, .25in.; Offset, .125in.
File type: PDF - To add the spine file to your pack in the Pack Editor, locate the Content Collection panel's heading, and click the Add Content option.
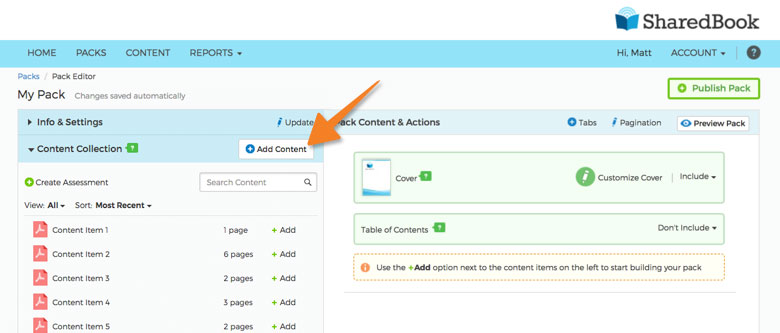
- In the Add Content dialog, use the options to upload your file.
- Once you've uploaded and closed the Add Content dialog, the file will be placed into your pack automatically.
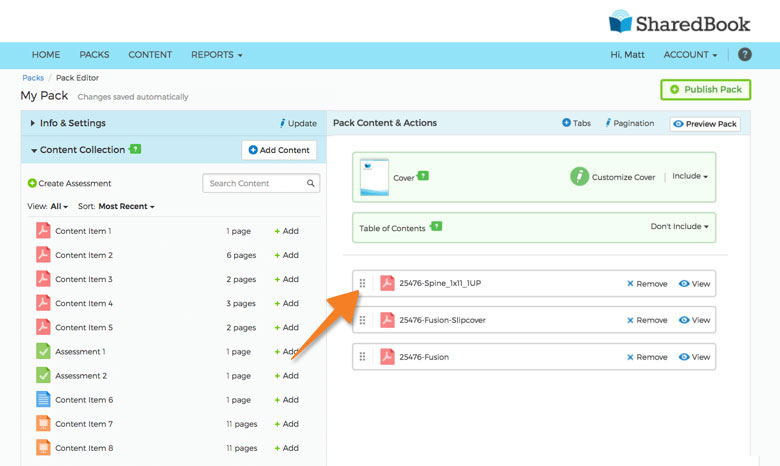
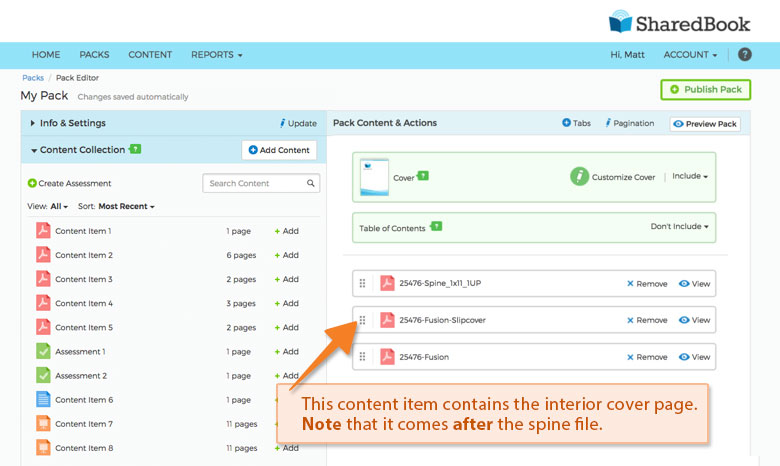
Interior Cover Page Placement
For packs in binders, the first page you see when you open your binder is the Interior Cover Page.
- The first page of the content item that's inserted after the content item that contains the spine file will be your interior cover page. It can be it's own content item, or be part of a multi-page item as long as it's the first page of that item.
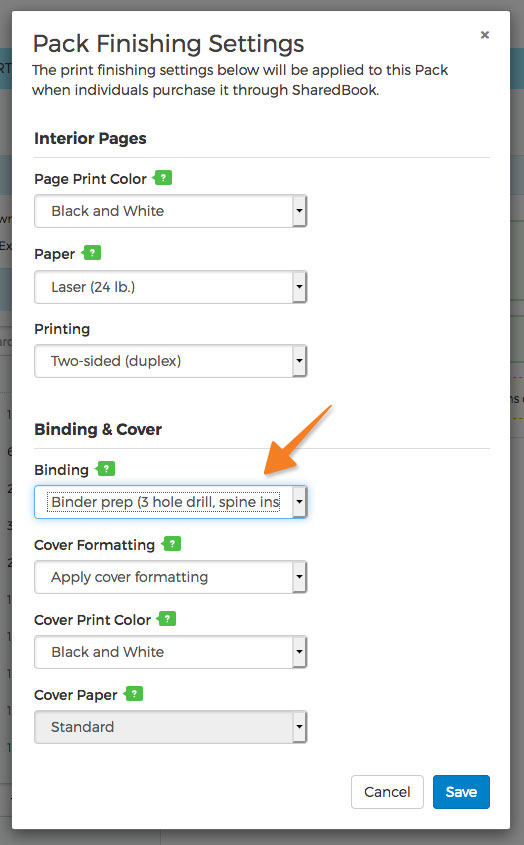
Pack Info & Settings Binder Selection
You can specify that your pack is printed with the Binder binding type by following the steps outlined below.
- In the Pack Editor, select the Update option in the Info & Settings panel.
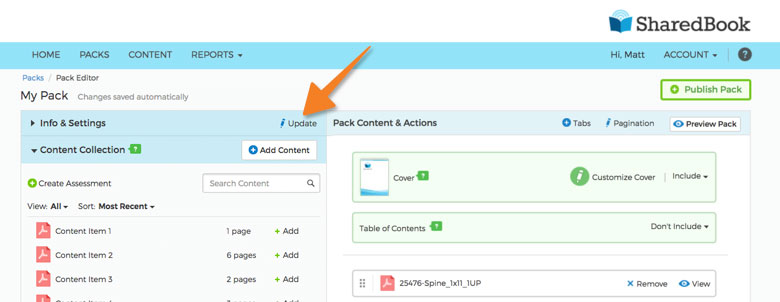
- Locate the Print Finishing Settings section and click the Edit Settings button on the right.
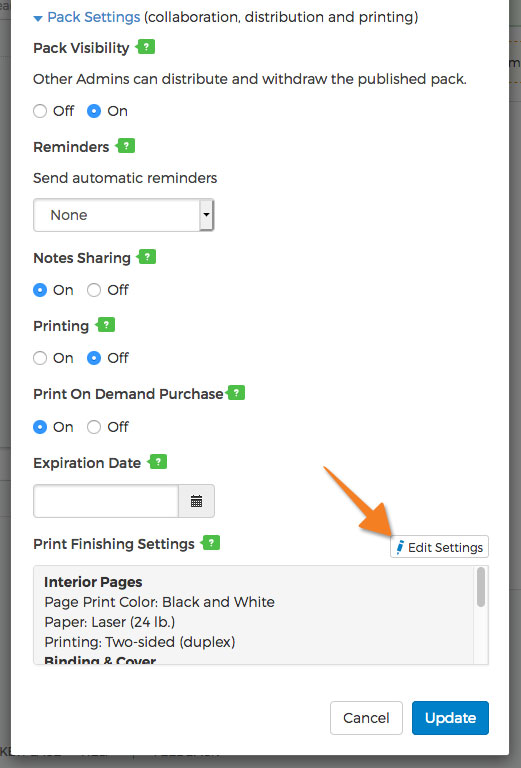
- In the Pack Finishing Settings dialog, locate the Binding options and select your Binder preference.
Saddle Stitch Instructions
In order to be processed successfully, the pack you select a saddle stitch binding type for has to be set up in a specific way in the Pack Editor. All of the items linked to in the list below must be formatted correctly to ensure success. While none of the steps are complex or long, they do need to be followed closely for you to receive the results you expect.
- Page Count and Filler Pages
- Back Cover (Last Page) Instructions
- Cover Setting
- Table of Contents Setting
- Pagination Setting
- Tabs Instructions
- Color Settings
Page Count and Filler Pages
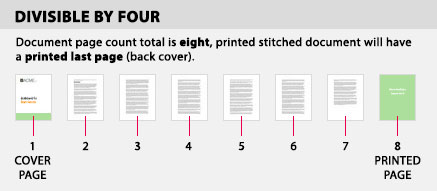
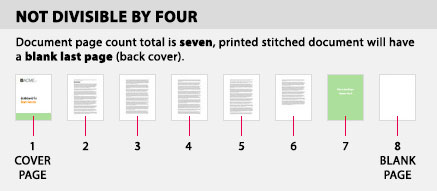
By necessity, the number of pages in a printed saddle stitched document is always divisible by four. If the total number of pages in your pack is not divisible by four, blank pages will appear at the end.
Saddle stitched packs are printed on folded 17 x 11in. paper that's stitched along the folded edge. One folded 17 x 11in. sheet creates four 8.5 x 11in. pages. This is why saddle stitched documents are by necessity, divisible by four.
Follow these steps to check your pack's total number of pages.
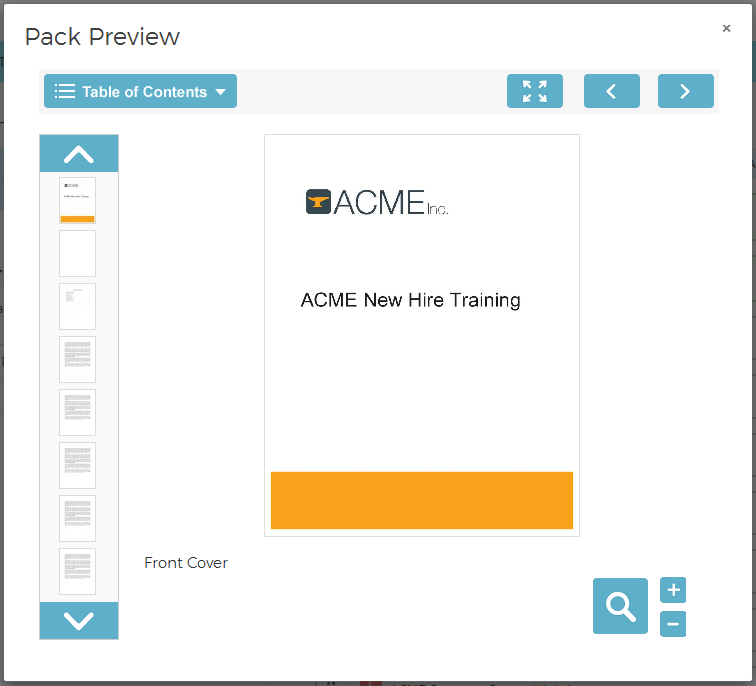
- In the Pack Editor, in the Pack Content & Actions heading, click the Preview Pack button.
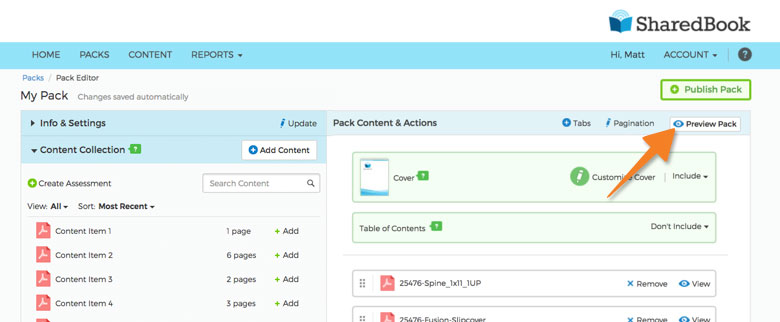
- In the Pack Preview dialog, use the navigation controls to go to the second to last page in your document.
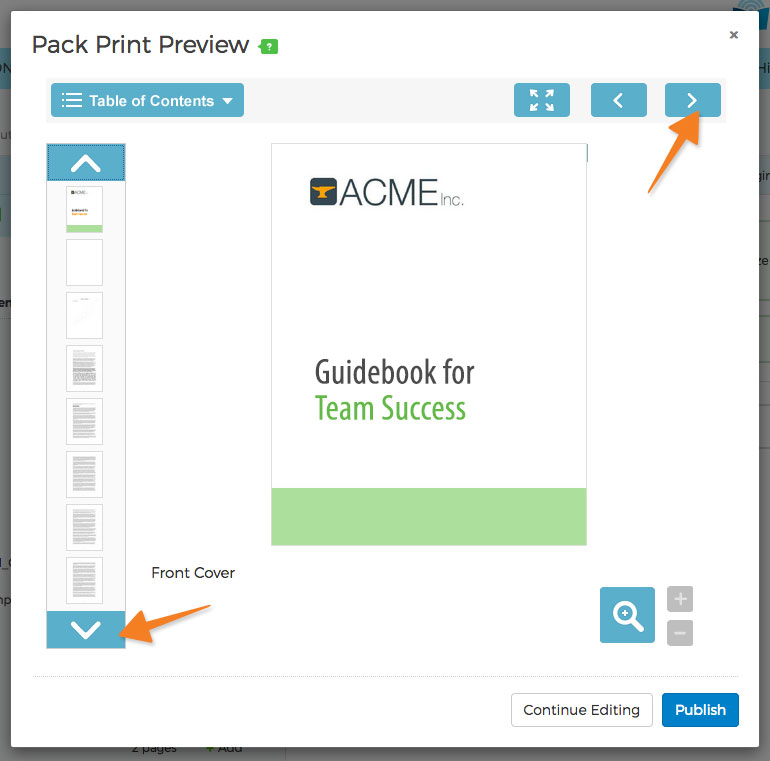
- Toward the bottom of the dialog, note the number of this page (in the example shown below, the number is fifteen). Add one to the number (e.g., 15 + 1 = 16), if the total is divisible by four (16 / 4 = 4), no blank pages will appear at the end of your saddle stitched document.
Back Cover (Last Page) Instructions
Because the total printed page count of a saddle stitched document is by necessity divisible by four, if you want a particular page to appear as the back cover of your document, it will have to land on a last page that's a number that's divisible by four. See instructions below.
- First check your pack's total page count by following the directions in the Page Count and Filler Pages section.
- When a document's total page count is divisible by four, and the last page of the digital document will appear as the printed last page or "back cover" of the stitched printed document (see image below).
- When a document's total page count is not divisible by four, then that last page of the digital document will not appear as the "back cover", instead, a blank page will appear as the back cover (see image below).
Cover Setting
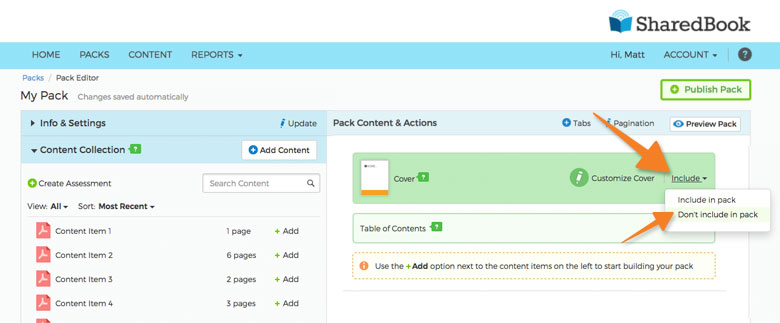
Packs with the Saddle Stitch binding type must not include a cover (an auto-generated cover is included by default and must be turned off).
- In the Cover panel, open the actions menu on the right and select the Don't Include in Pack option.
- When the auto-generated cover is not included, the first page of the first piece of content in your pack will be your actual cover.
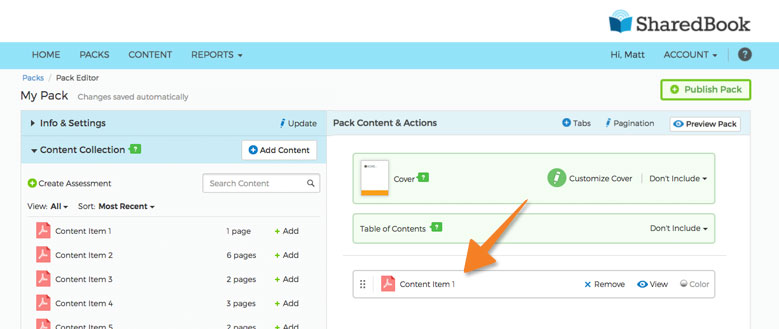
Table of Contents Setting
Packs with the Saddle Stitch binding type must not include an auto-generated Table of Contents.
- In the Table of Contents panel, select the Don't Include option. It's in the second panel of the Pack Content & Actions area on the right.
Pagination Setting
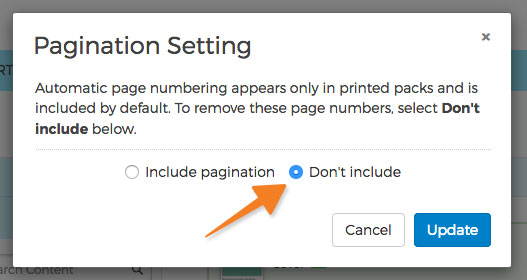
Packs with the Saddle Stitch binding type must not include pagination. Pagination is on by default and must be turned off.
- In the Pack Content & Actions heading, select the Pagination option.
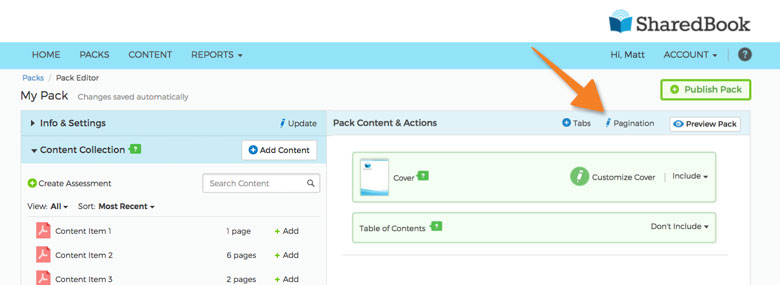
- In the Pagination dialog, select the Don't include option, then click the Update button.
Tabs Instructions
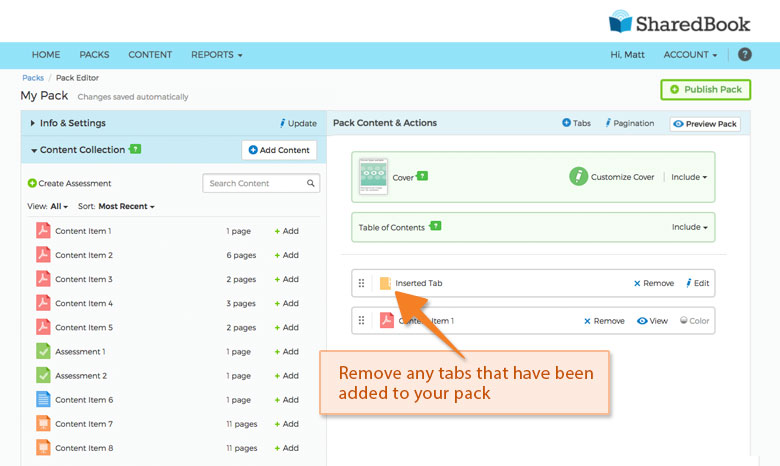
Packs with the Saddle Stitch binding type must not include any tabs.
- Review your pack and remove any tabs that may have been inserted.
Color Setting
Packs with the Saddle Stitch binding type must not have any items with mixed color.
- In the Pack Editor, select the Update option in the Info & Settings panel.
- Locate the Print Finishing Settings section and click the Edit Settings button on the right.
- In the Pack Finishing Settings dialog, check that the Page Print Color is set to either Black & White or Full Color—the Both Color and Black and White option must not be selected.

Previewing
When you've completed your pack, use the Preview Pack option on the upper right to see how it will look.

The pack preview window provides options for scrolling through your pack or paging through it in full screen mode.
Publishing
A pack has to be published before it can be digitally distributed or ordered as printed copies. Once you've made any final changes to your pack and then previewed and reviewed it thoroughly—it's time to publish. Click the Publish Pack button on the upper right.

A pop-up window will open asking you to confirm that you're ready to publish—once you publish and distribute a pack it's "frozen" and cannot be edited further without withdrawing it from anyone it has been distributed to. To avoid disruption to recipients of distributed packs, be sure that the pack has been finalized before you publish and especially before you distribute.
Return to topManaging Packs
Managing Packs Overview
Once packs are created, they appear on the Packs screen. Packs that have been made public by others in your organization will also appear on your Packs screen.
Pack status
A pack can have one of three statuses, Draft, Published and Revising. Your packs with a Draft status can be edited, but cannot be distributed until you have published them in the Pack Editor—once you do that, they'll have the Published status and can be distributed, ordered as printed packs, and if necessary, withdrawn and revised as well.
Info & Settings
After you've created a pack, you can change its name, author and other settings. Use the Actions menu for the pack you want to update and select Info & Settings.

This will open a pop-up window where you can update different settings for this pack, as well as change the name. Note, the options in this window will vary depending on your organization's platform settings.
You can also expand the Pack Settings section to update collaboration and distribution settings.
After completing your changes, click the blue Update button to save them.
Return to topDistributing Packs
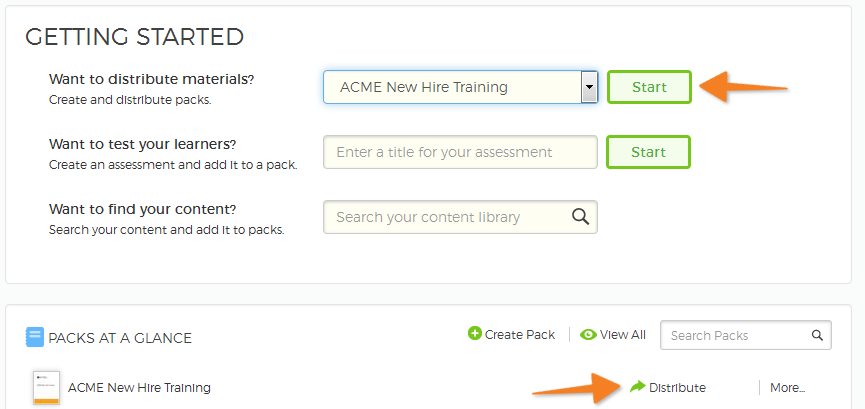
When you're ready to distribute a pack or order printed copies, you can distribute it from the Home or the Packs page. On the Home page, there are two ways to initiate pack distribution. From the top drop-down menu, select the pack you want to distribute and click the Start button. You can also click the Distribute link next to the pack you want to distribute in the Packs at a Glance section.
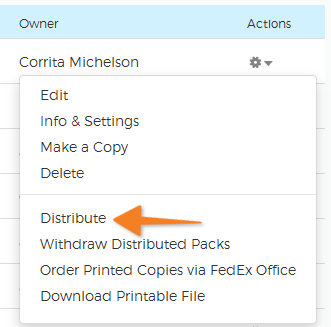
On the Packs page, select the actions icon for the pack you want to distribute and select the Distribute option.
Selecting the Distribute option on either the Home or Packs pages launches a pop-up window where you can select who gets the pack and whether they receive a link in their email or a pack activation code.
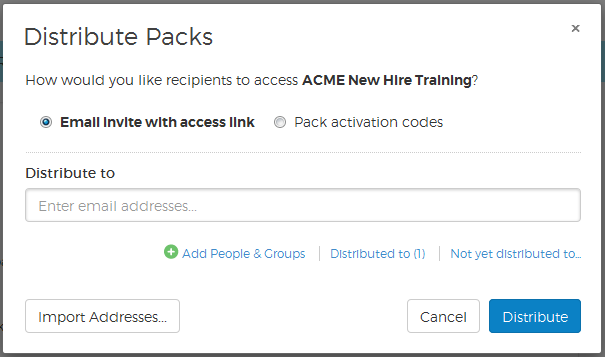
Distribute Via Email
When you add recipients you can also add a message that's included with the email invite.
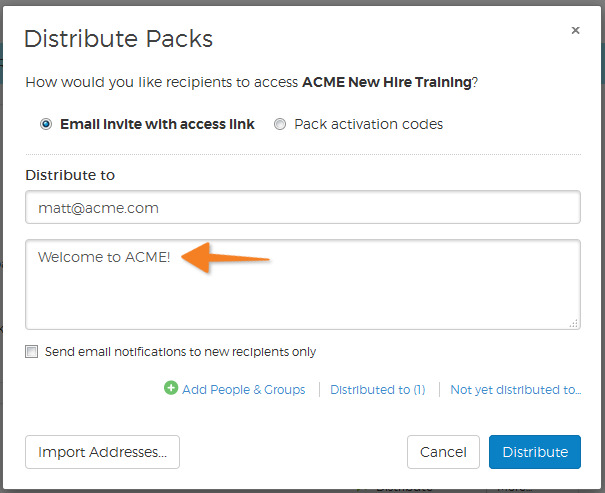
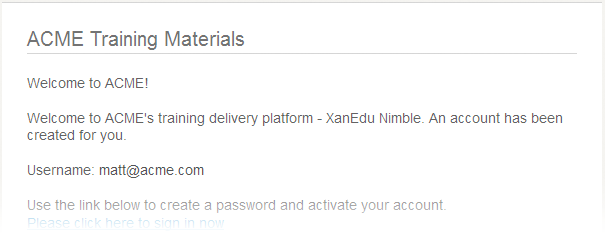
Participants will receive an email inviting them to create a password if they don't already have an established account. Steps to access the mobile apps after account setup is also included.
Distribute via Activation Codes
If you prefer to use activation codes instead of email invitations, select the Distribute option for a pack and at the top of the Distribute Packs pop-up window, select the Pack activation codes option shown in the image below.
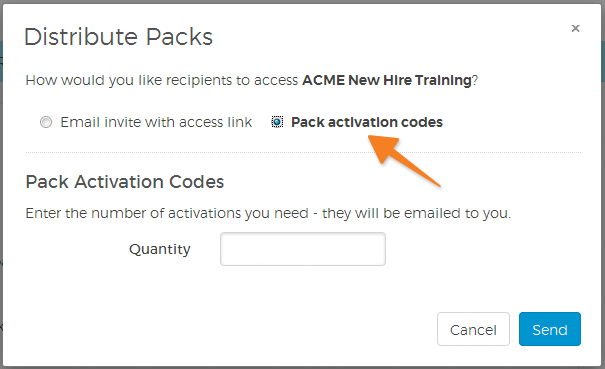
Enter the number of codes you need and they will be delivered to your email address. You can then distribute the codes to participants yourself.
Return to topRevising Distributed Packs
Revising a distributed pack should be reserved for cases where there are significant issues with the pack, as it "orphans" any highlights or notes a participant has created. Orphaned notes and highlights are displayed in a separate section of the Notes & Highlights panel in the Pack Reader and are no longer in-line with content as they usually are.
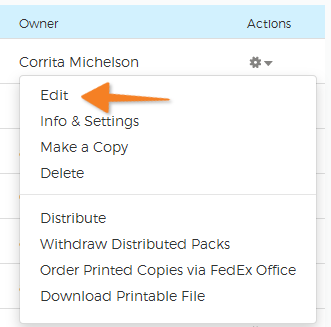
If a pack must be revised, select Edit from the actions menu of a Published pack.
After making your revisions, you can select the Publish Revisions button in the upper right.

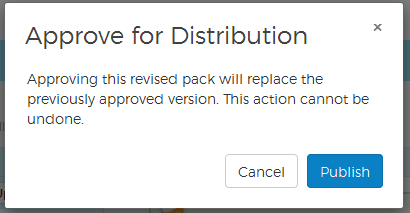
After selecting Publish Revisions you'll see a pop-up asking you to confirm that you want to publish the revised version of the pack—click the blue Publish button to complete the process.
Discard Revisions
The Discard Revisions option will undo any changes that you've made since the last version of the published pack. So If you'd like to delete all changes and revert to the last published version of your pack, select the Discard Revisions option.
Return to topWithdrawing Distributed Packs
Withdrawing a pack will make the pack and its content inaccessible to participants that have received it.
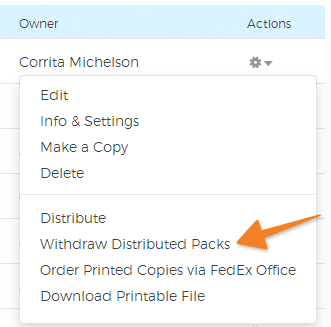
On the Packs page, select the Withdraw Distributed Packs option in the actions menu for the pack you wish to withdraw.
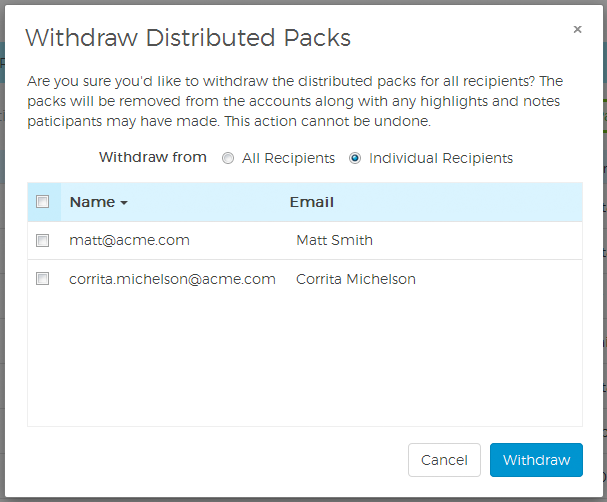
In the Withdraw Distributed Packs pop-up window, you can withdraw a pack from all recipients or from selected individuals.
 Return to top
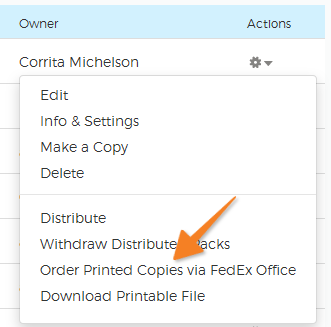
Ordering Printed Packs
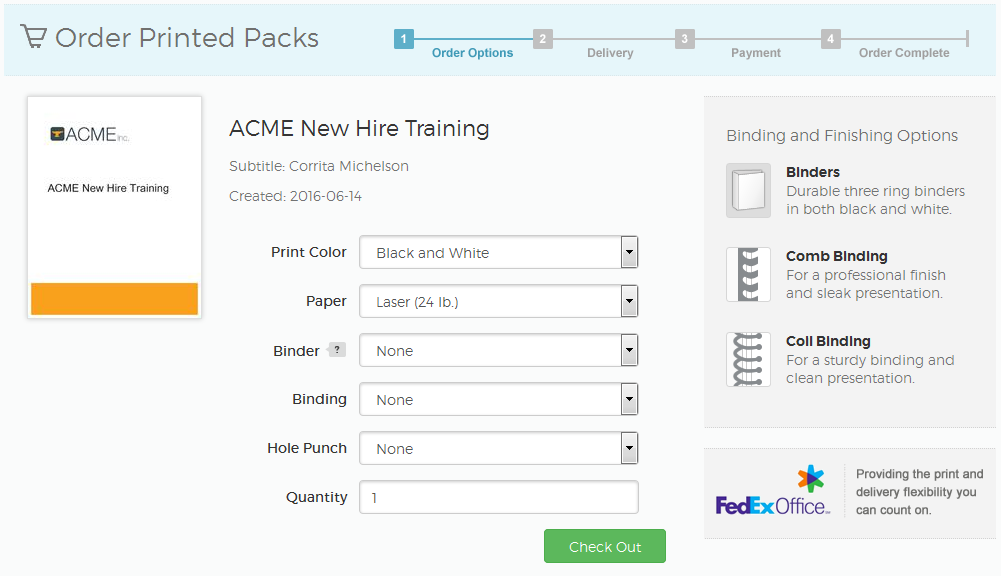
You can order printed versions of published packs from the Packs page. Selecting the Order Printed Copies via FedEx Office option from the pack's action menu will bring you to the Order Options page.
On the Order Options page select the print options that best suit your needs. On subsequent order screens, you can choose from different delivery methods and enter shipping and billing information.
 Return to top
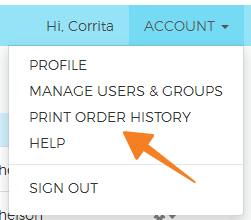
Print Order History
Using the web interface you can see the history of any printed copies that you've ordered. In the Account menu, select the Print Order History option.
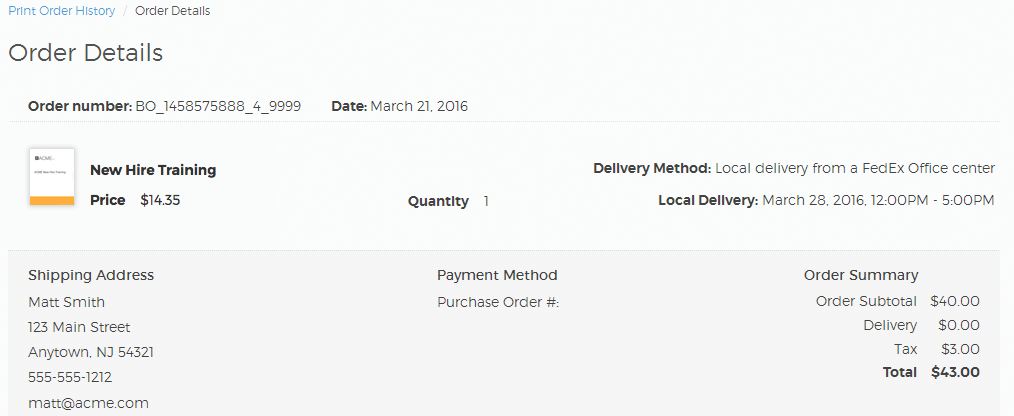
A list of your print orders and details appears on the Order History page.

To view an order's full details, open the actions menu and select the Order Details option.
 Return to top
Downloading Packs
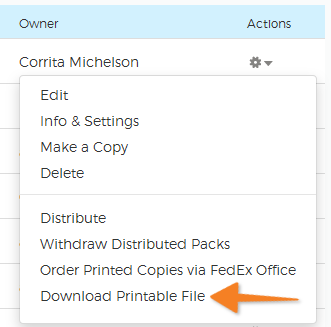
You can download a PDF of your entire pack by selecting the Download Printable File option from a pack's actions menu on the Packs page.
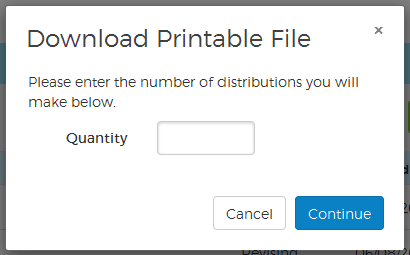
You'll be asked how many copies of the file you will distribute in this format—enter the number and click the Continue button.
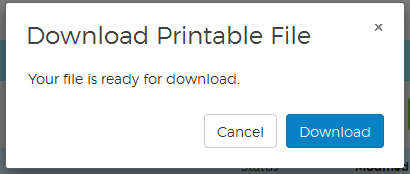
A pop-up window will open when your file is ready, click the Download button to begin downloading the file to your computer.
 Return to top
Copying a Pack
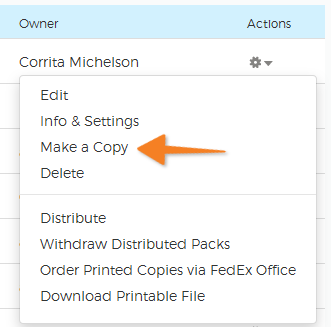
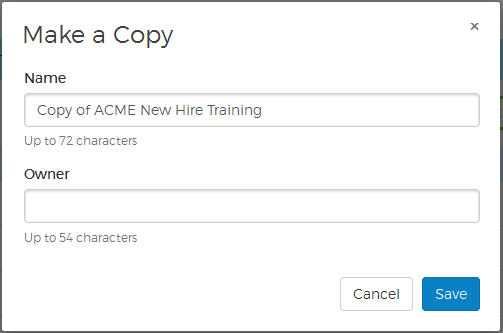
You can make a copy of a pack by selecting the Make a Copy option in the actions menu on the Content page.
A pop-up dialog will open letting you change the name of the pack (it will default to "Copy of" and then the original pack name) and enter the name of the author. When you're finished making these edits, click the blue Save button.
 Return to top
Reports
Overview
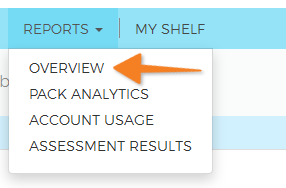
As an administrator, you can view reports on how participants are using your content, assessments and packs. To get a top-level view of reporting activity, select Reports in the top navigation menu and then click Overview.
The Overview page shows statistics for account usage, pack analytics and assessment results.
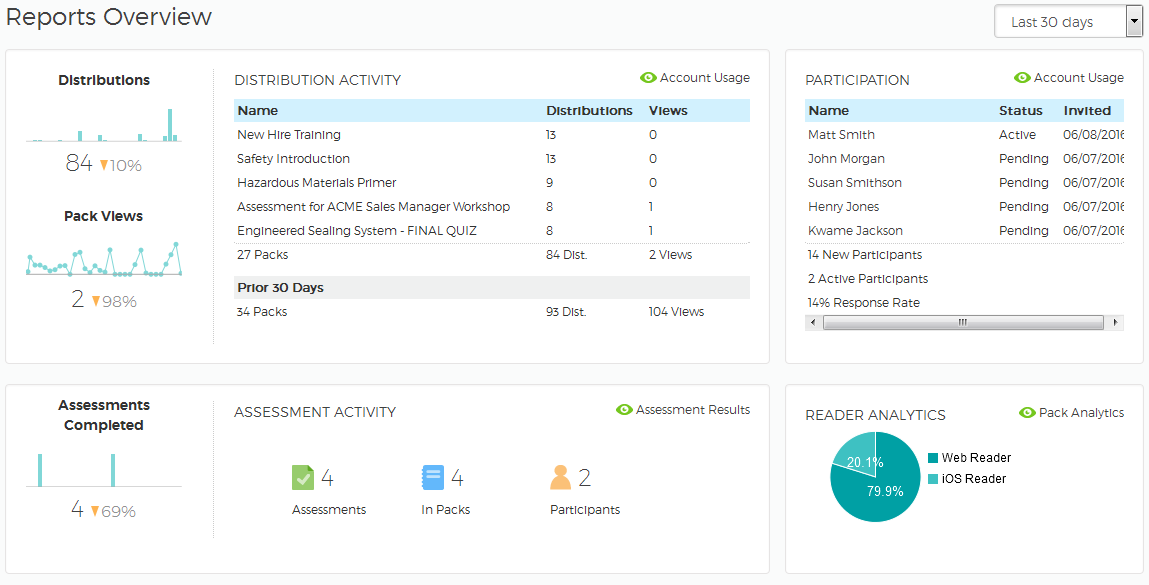
For more detailed views, click the Account Usage, Assessment Results or Pack Analytics links on this page or access them from the Reports drop-down menu in the navigation bar at the top of the page.
Return to topPack Analytics
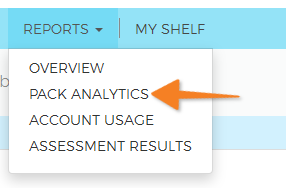
The Pack Analytics Report gives a detailed view of how participants are using and interacting with your packs. Select Reports in the top navigation menu and then click Pack Analytics.
The report includes the Top Viewed Packs, Average Time Spent, Search Rate, Top Search Terms, Notes & Highlights statistics, and which clients are being used to view the packs (Web Reader, iOS and Android apps).
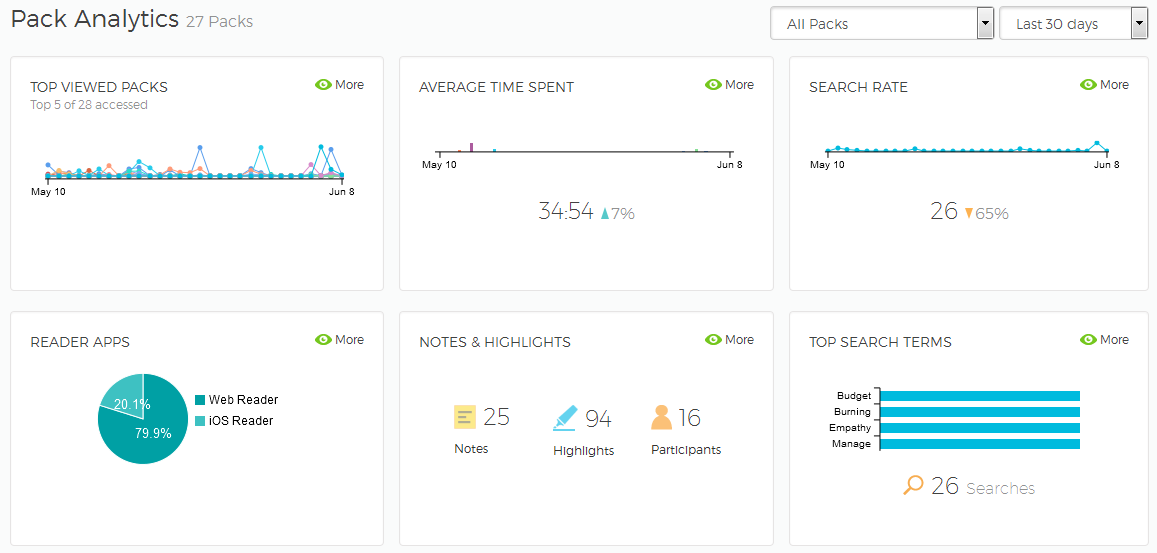
View the analytics for a specific pack and/or change the date range for the analysis using the two drop-down menus in the upper right.
 Return to top
Account Usage
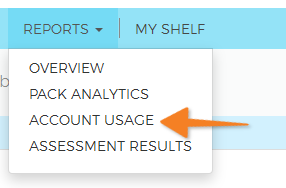
There are a number of Accounts Usage Reports that provide detailed information on how many users are performing specific tasks, as well as the behavior of specific users. Select Reports in the top navigation menu and then click Account Usage.
A list of available reports appears on the Account Usage Library page.
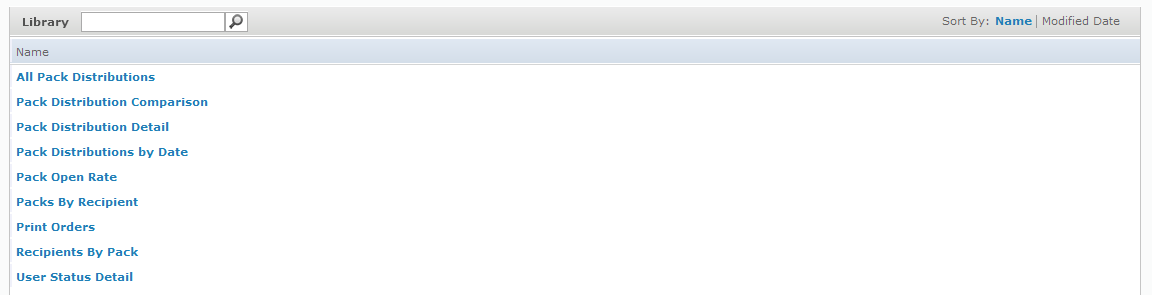
For example, you can see which participants have received each pack by selecting the Recipients By Pack report.

You can then select a pack from the drop-down list and click the blue Apply button, which will show you each recipient, who distributed the report to them and when.
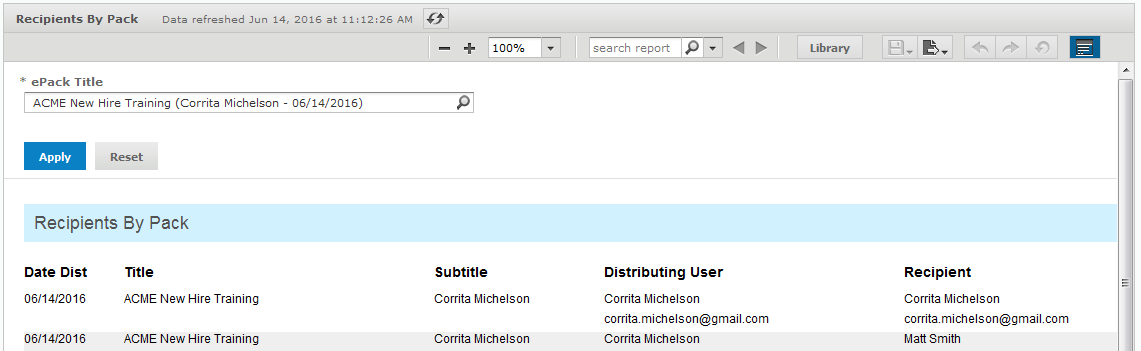
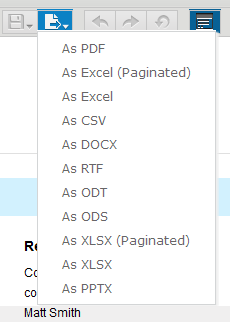
In addition to viewing the report online, you can export the report in a number of formats by clicking the Export icon and selecting the desired format.
Selecting the Library button will return you to the list of Account Usage Reports.
 Return to top
Assessment Results
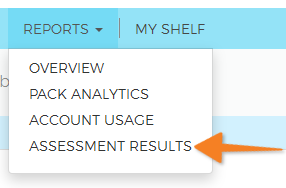
To view reports on how participants are faring on assessments—select Reports in the top navigation menu and then click Assessment Results.
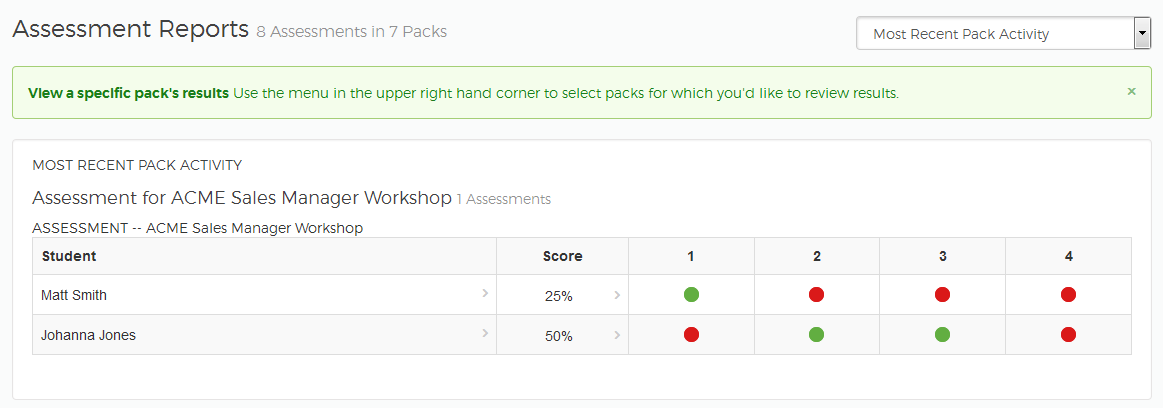
For each assessment, you will see which participants have completed the assessment and how they fared on each question.
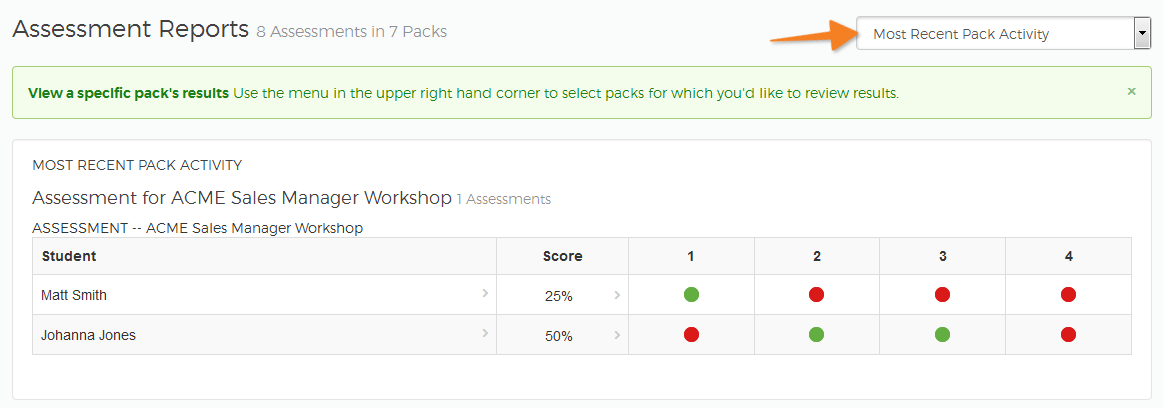
To see the results for a particular assessment—select it from the drop-down menu in the upper right.
 Return to top
Managing Accounts
Creating New User Accounts
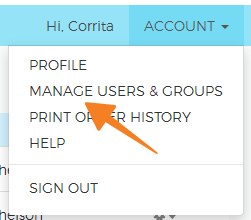
As an administrator, you can create new user accounts for your organization. Select Account in the top navigation menu and then click Manage Users & Groups.
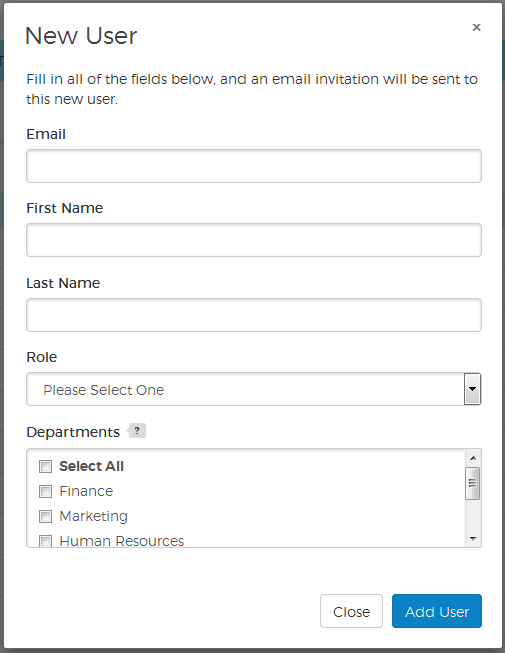
On the Manage Users screen that opens, you'll see a list of all users for your organization. Click the green Add User button in the upper right of your screen.

Enter the new user's email address, first name and last name. Then use the Role drop-down menu to select the appropriate role for that user (read more about user roles). When you're finished, click the blue Add User button.
 Return to top
Updating A Profile
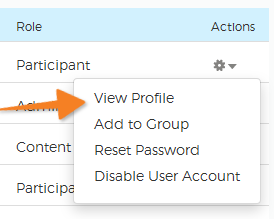
As an administrator, you can update a user's profile information. Locate the user whose profile you want to update in the list, on the right, click the actions menu icon ![]() and select the View Profile option.
and select the View Profile option.
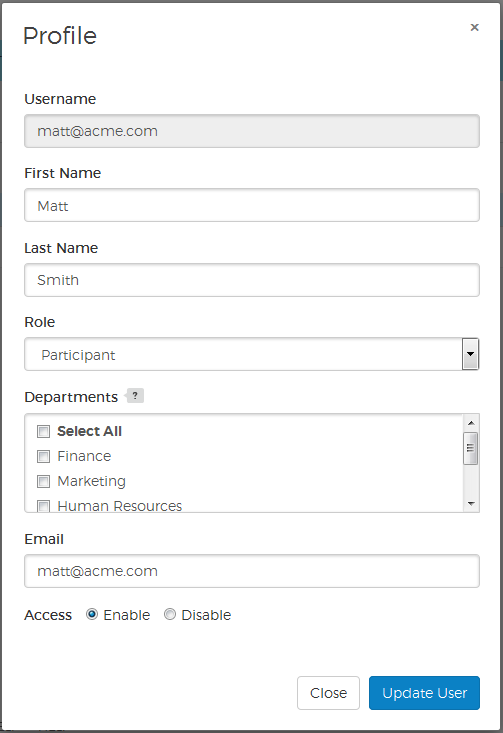
In the Profile pop-up window administrators can change any of the following: Role, First Name, Last Name and Email Address, as well as enabling or disabling account access. The Username cannot be changed.
 Return to top
Adding a User to a Group
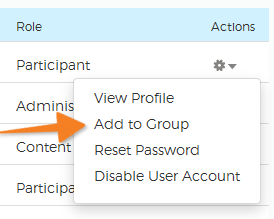
As an administrator, you can add users to groups—locate the user you want to add in the list, on the right, click the actions menu icon ![]() and select Add to Group.
and select Add to Group.
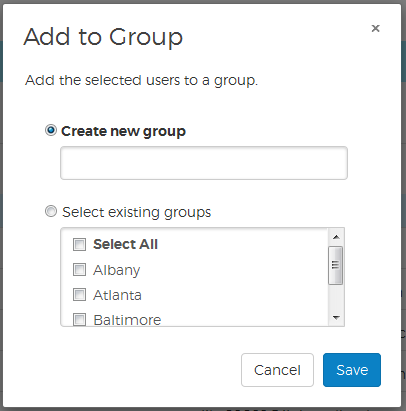
In the Add to Group pop-up window, select one or more existing groups or create a new one by entering a group name—click the Save button to finish.
 Return to top
Resetting a Password
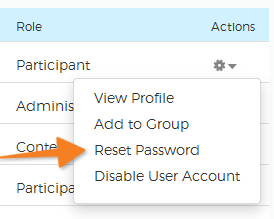
As an administrator, you can reset a user's password, which sends them an email containing a link to reset their password. In the action menu associated with the user whose password you want to reset, click Reset Password.
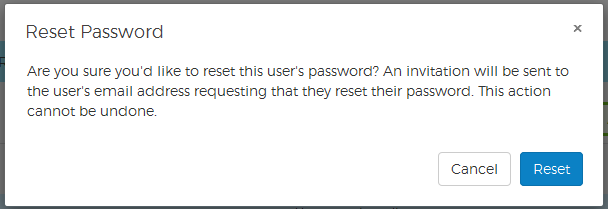
After selecting the Reset Password option, you'll be asked to confirm this action—click the Reset button to finish.
 Return to top
Disabling User Accounts
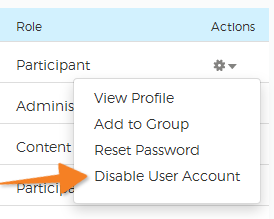
As an administrator, you can disable a user's account, which prevents them from accessing any of their materials. In the action menu next to the user you want to edit, click Disable User Account.
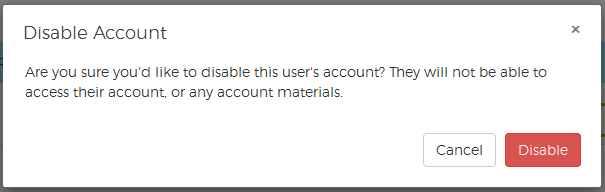
You'll be asked to confirm this action, since it will effectively lock the user out of the SharedBook platform.
A user's access can be re-enabled by editing their profile and selecting the Enable access button and updating their profile. Return to top
Accessing & Using Distributed Materials
Account Activation
When accessing distributed packs for the first time, participants must activate their SharedBook account using a web browser. This is a quick step taken after clicking a pack link in the email invitation received when material is distributed. The link in the email will open a page where participants enter their account password. This action only has to be taken the first time SharedBook is used.

Once the password has been entered, the account is activated and participants can access distributed packs in the SharedBook Web Reader, or using one of the SharedBook iOS or Android apps.
 Return to top
Accessing Distributed Packs
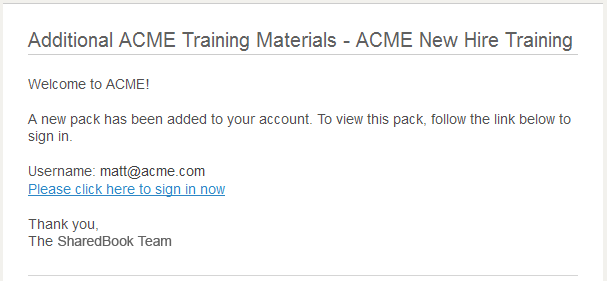
When a pack is distributed, participants receive an email invitation to view it.
To access the content, just sign into your SharedBook account in a web browser or open the SharedBook app on your mobile device.
Return to top
Accessing Packs in the Mobile Apps
Downloading the Apps
It's easy to access and view packs using the SharedBook mobile apps. To get started, you'll need to install one of the SharedBook apps—download the iOS version for iPhone and iPad from iTunes, or download the Android version from the Google Play Store.
Downloading Packs to the Apps
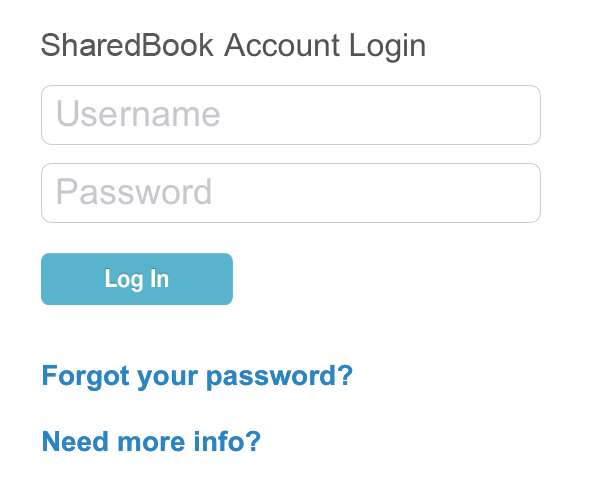
Once the app is installed, you can download packs from your SharedBook account into the app Library. In the app, log into your SharedBook account using the email address that the pack invitation was sent to and the password you entered to activate your account.
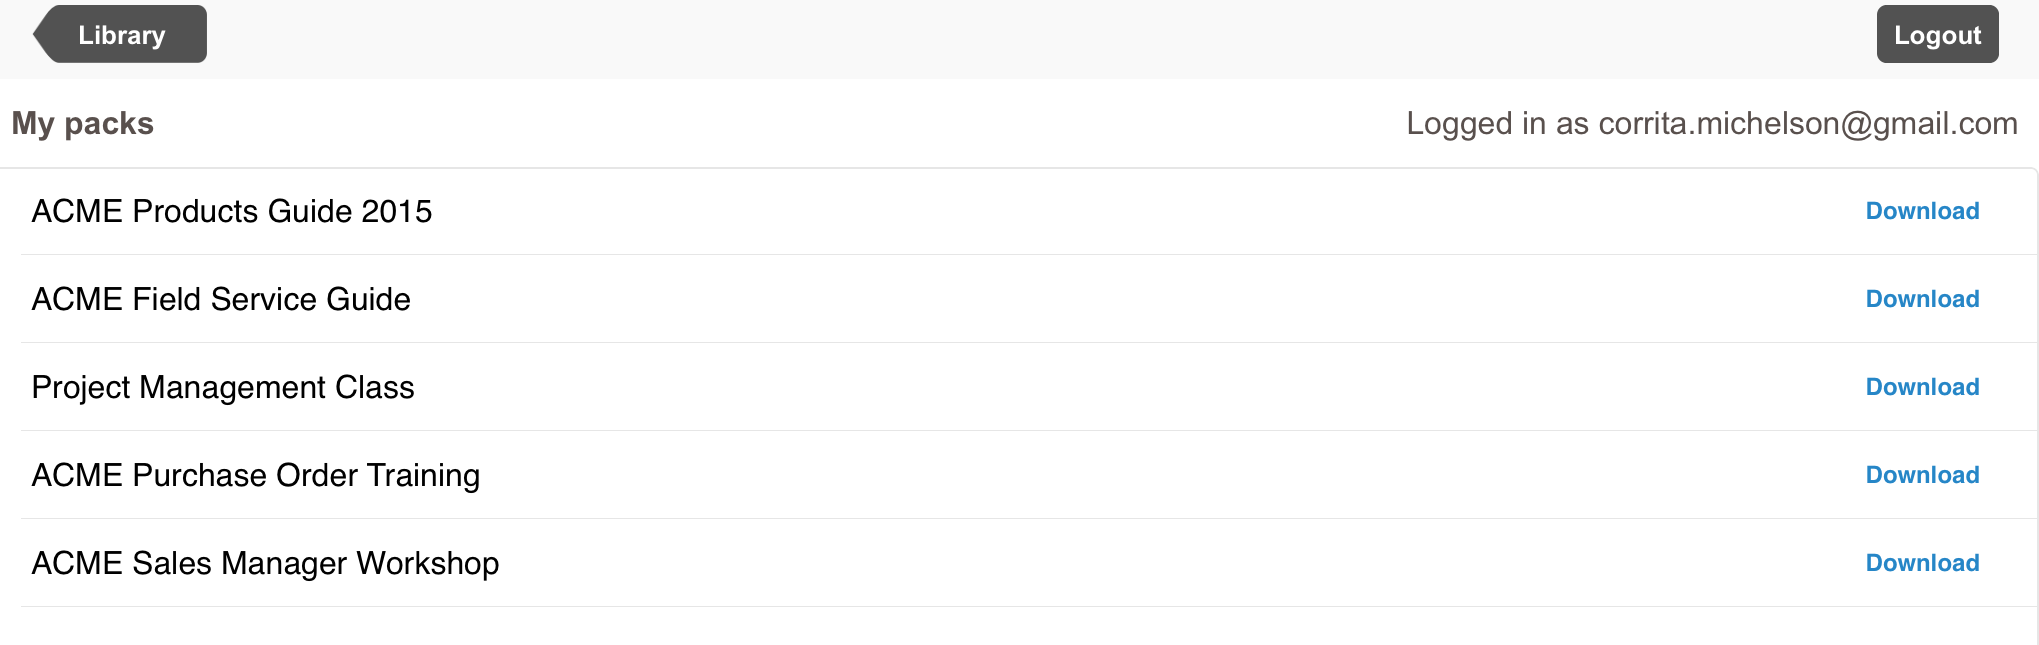
After logging into your account through the app, you'll see a list of Packs that have been distributed to you. You can tap on the Download link next to each one you wish to download to your Library.
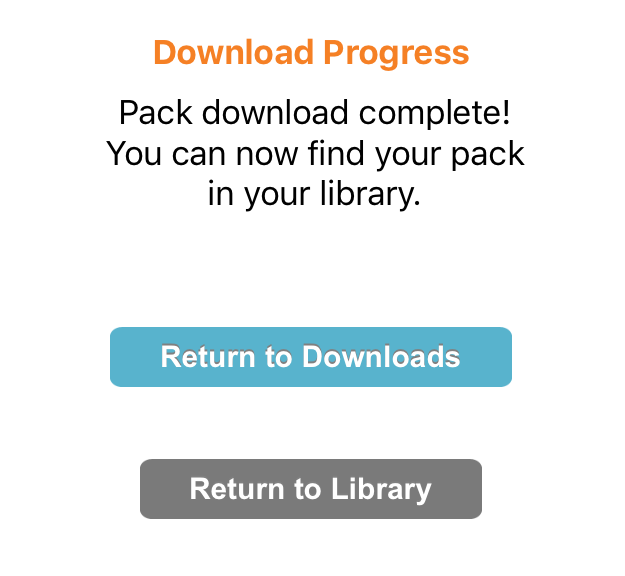
Once the download process has finished, you'll have the option to return to the list of packs in your online account, "Return to Downloads", or to go to the Library shelf and open your pack, "Return to Library".
Library
Your Library offers easy access to downloaded packs—just tap a pack to open it in the Reader. The Library has two views—list and thumbnail. To toggle between them click the fourth icon on the right, it changes based on the selected view.
List view: ![]() Thumbnail view:
Thumbnail view: ![]()
List view shows a list of your packs. Click the thumbnail icon to return to thumbnail view.

Remove and Re-order Packs in List View
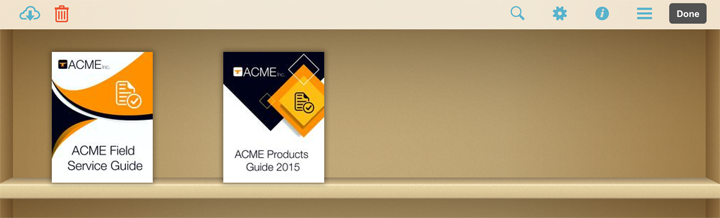
You can also tap the Edit button in the upper right of the screen to remove packs from the shelf or change their position.
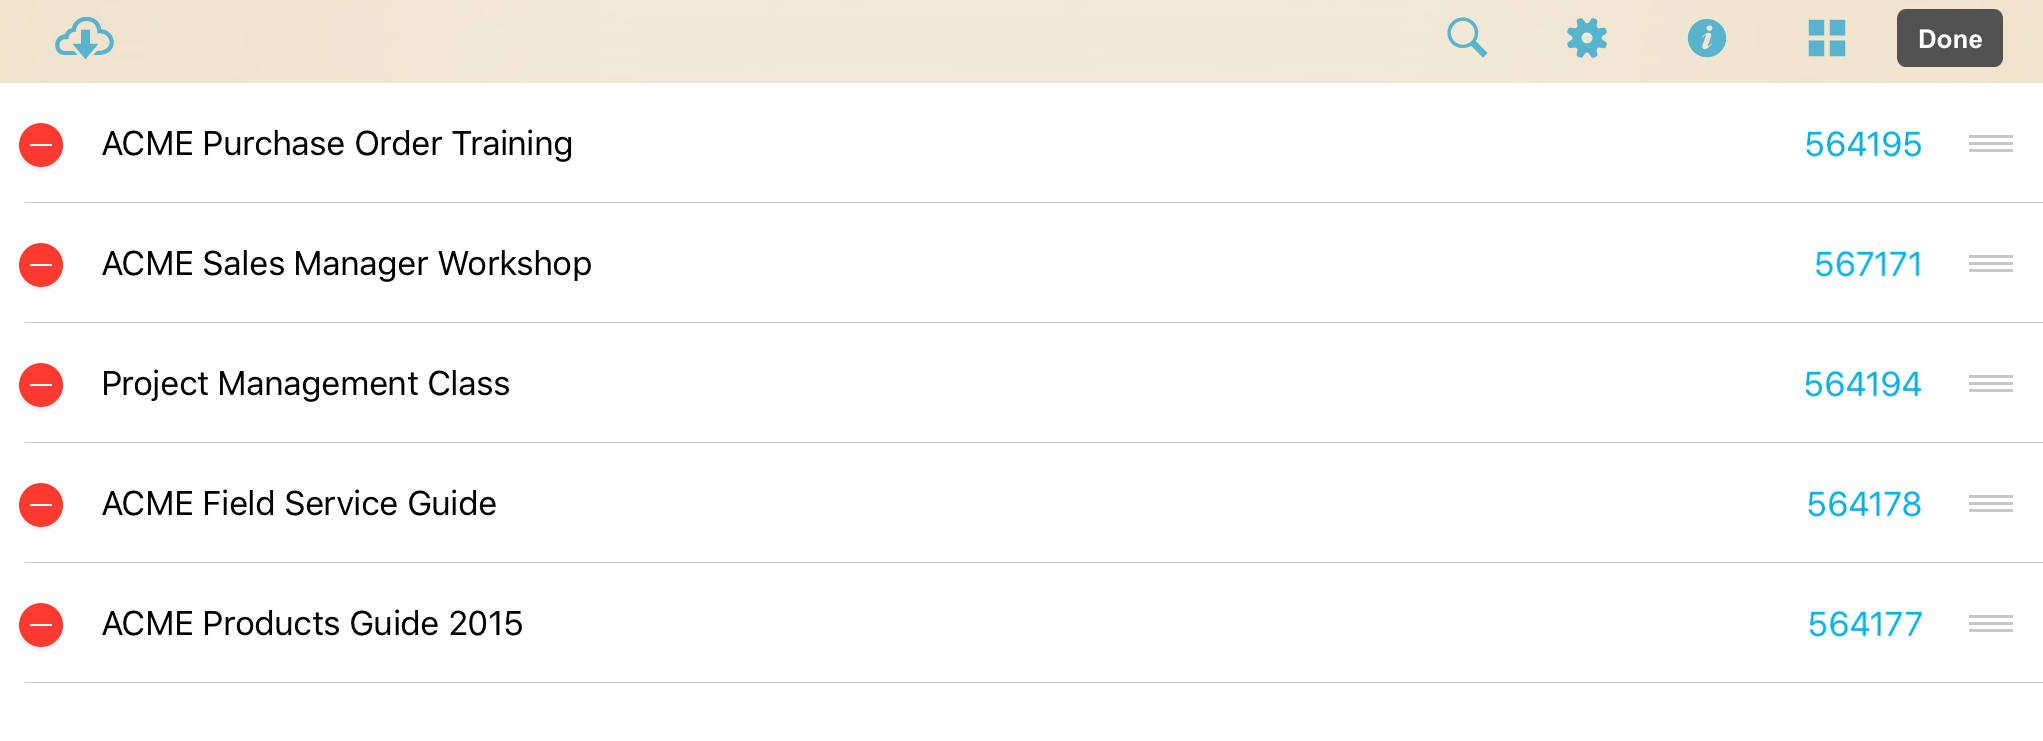
To remove a pack, select the red circle with a dash in it (to the left of the pack name). To change the position of a pack in the list, select the three horizontal lines icon (to the right of the pack name) and drag it to the desired location. Once you're done editing, tap the Done button on the upper right.
Remove and Re-order Packs in Thumbnail View
You can also remove and re-order packs in thumbnail view—tap the thumbnail view icon ![]() to toggle back to that view, then select the Edit button to the right of it. A Done button will appear, when you've finished your changes you'll use this button to leave the editing mode.
to toggle back to that view, then select the Edit button to the right of it. A Done button will appear, when you've finished your changes you'll use this button to leave the editing mode.
You can now select a pack that you want to edit. Once selected, a red checkmark will appear on its cover.
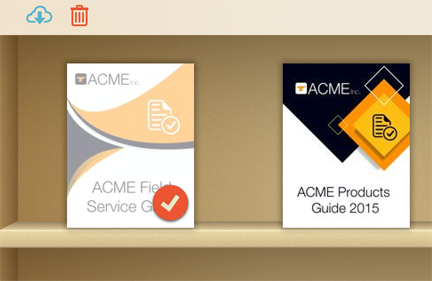
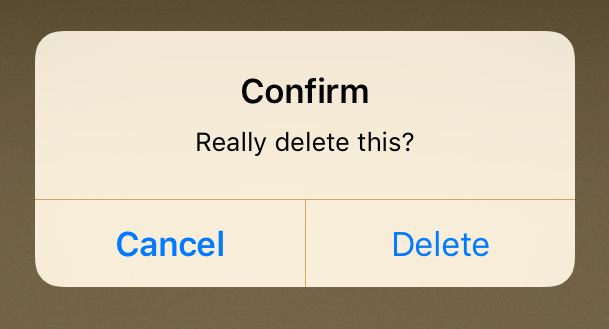
To delete a selected pack, tap the Trash Can icon in the upper left of the screen. After this you'll be prompted to confirm the deletion.
Searching Pack Content from the Library
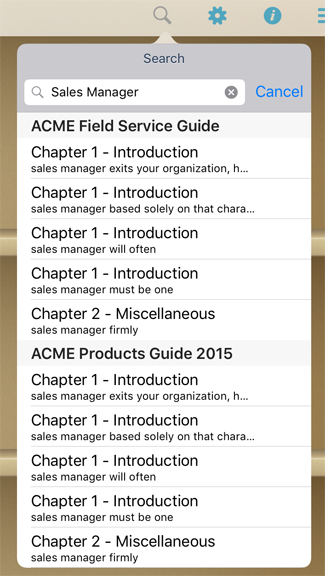
From the Library view you can perform several other actions. To search for something across all of the packs in your library, tap the Magnifying Glass icon in the toolbar at the top and type in your search term(s). Search results will appear in a list showing the location of the results in the packs. Select the correct result and it will open the corresponding pack to the desired location.
Settings
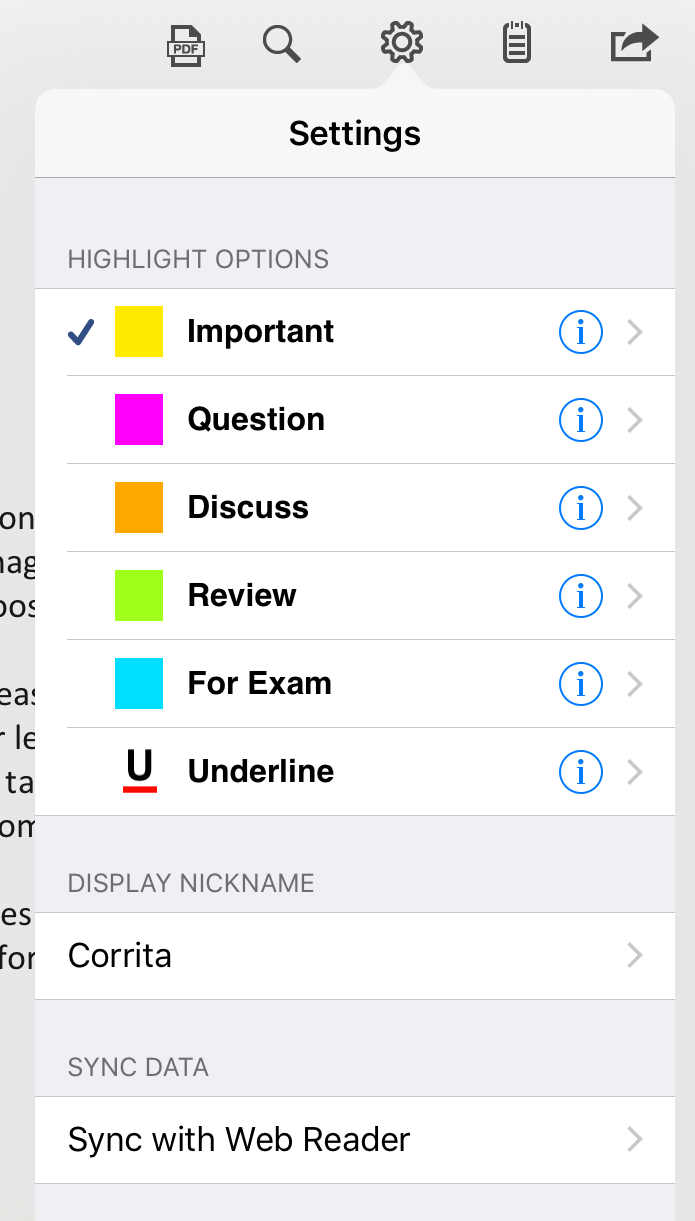
By selecting the Settings icon, you can edit some of the settings that will be applied when you're highlighting and commenting on packs.
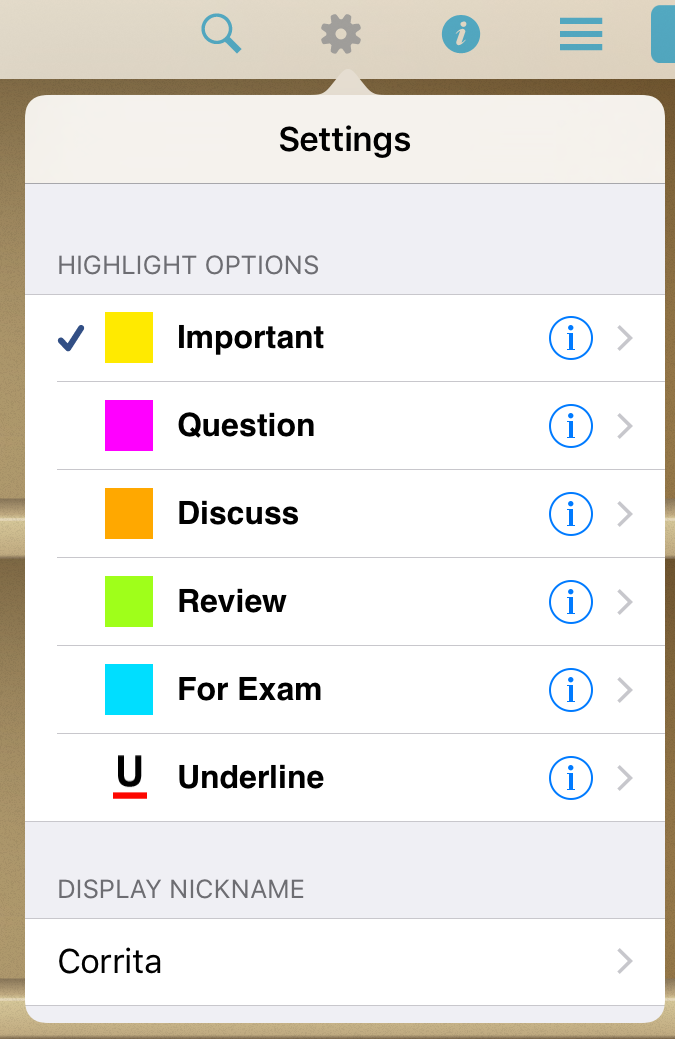
You can select any of the Highlight options and change the label name for each color highlight—you can also select Display Name to change which name is used when you highlight or make notes in a pack. This is the name that will appear alongside your notes and highlights when you share them.
Return to topViewing Packs in the Mobile Apps
To start reading a specific pack, just tap on it from either the List or Thumbnail view.
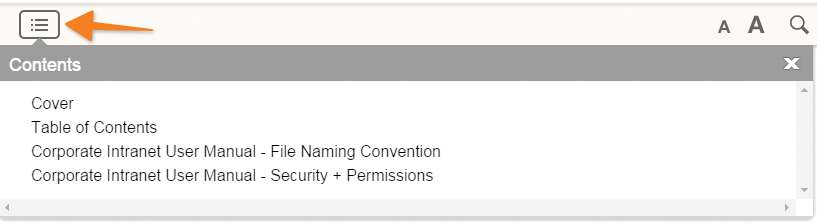
Once you open a pack, use the navigation controls at the bottom of the screen to page forward and back, swipe to scroll page content, or you can tap the Contents icon on the upper left (three horizontal lines with dots to the left of them) to see each section of the pack.
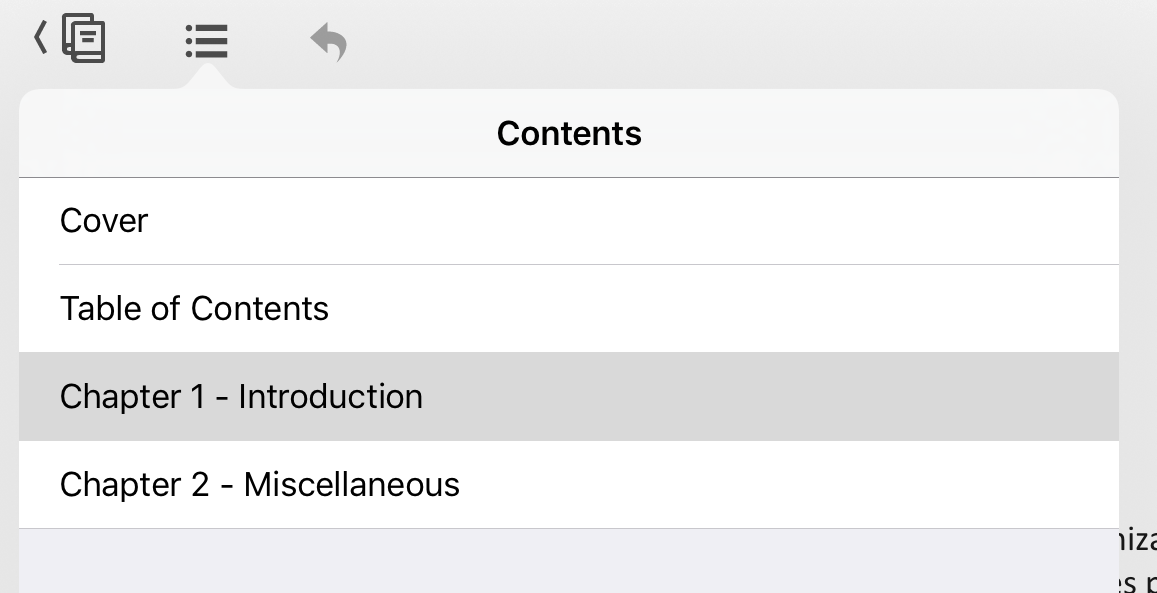
Navigate to specific articles using the pack's Content panel and selecting the Article you want to read.
Icon Glossary
 |
Settings | Tap this icon to access settings such as highlight color and label. |
| Library | Tap this icon to return to the Library of packs on your mobile device. | |
| Content | Tap this icon to view the list of articles in your pack. Select a title to navigate to the first page of the article. | |
| Actions | Select this icon to Share Notes or Print. | |
| Back | If you've selected an internal exhibit or footnote while reading your pack, and you wish to return to original location, tap this icon. | |
 |
Font Size | To change the font size of the pack, tap on the small 'A' to decrease the font or the large 'A' to increase the font. |
 |
PDF Content | To change the reading size of an article that's in PDF format, double-tap or pinch-to-zoom to increase or decrease the size of the font. |
 |
Search | Tap this icon in the Library view to search across all packs and notes in your Library. Inside the pack, this icon allows you to limit your search to the current pack. |
| Notes | Tap this icon to access your pack notes, or to view all notes and highlights. |
Return to top
Working with Notes & Highlights on a Mobile Device
Create Notes and Highlights
While reading a pack, you can select specific text and make a highlight or note. First, select the text you want to work with.
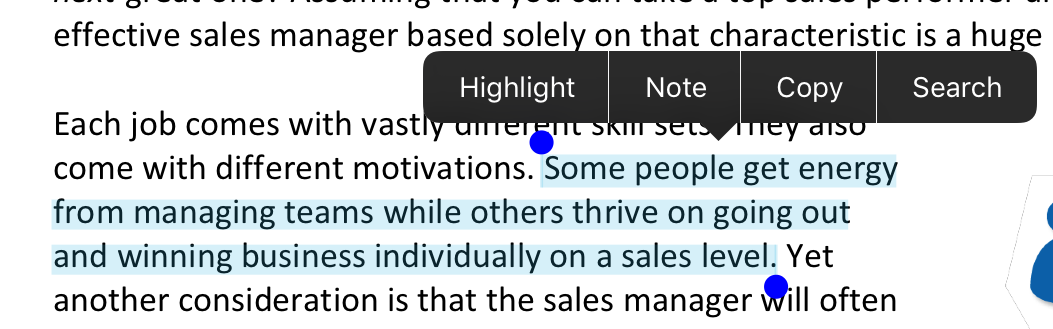
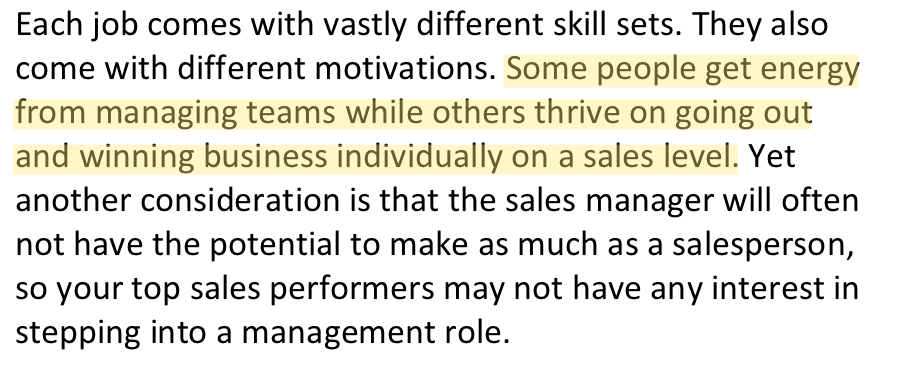
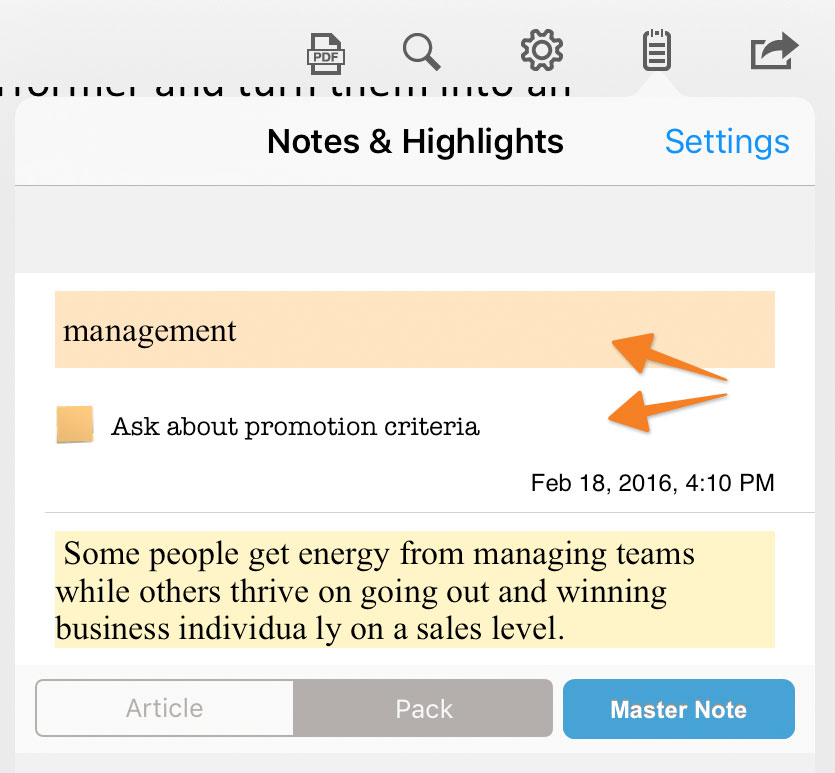
When text is selected, a toolbar opens with options to add a highlight and make a note—you can also copy and search. Selecting Highlight will highlight the text. For more highlighting options, tap the highlighted text to open the highlighting toolbar. You can change the color of the highlight, add a note to it, or remove it.
Notes and Highlights Panel
Highlighted text and notes also appear in the Notes & Highlights panel. Access the panel by selecting the icon in the upper right of the screen. Tapping the highlights and notes in the panel will take you to their location in the content.
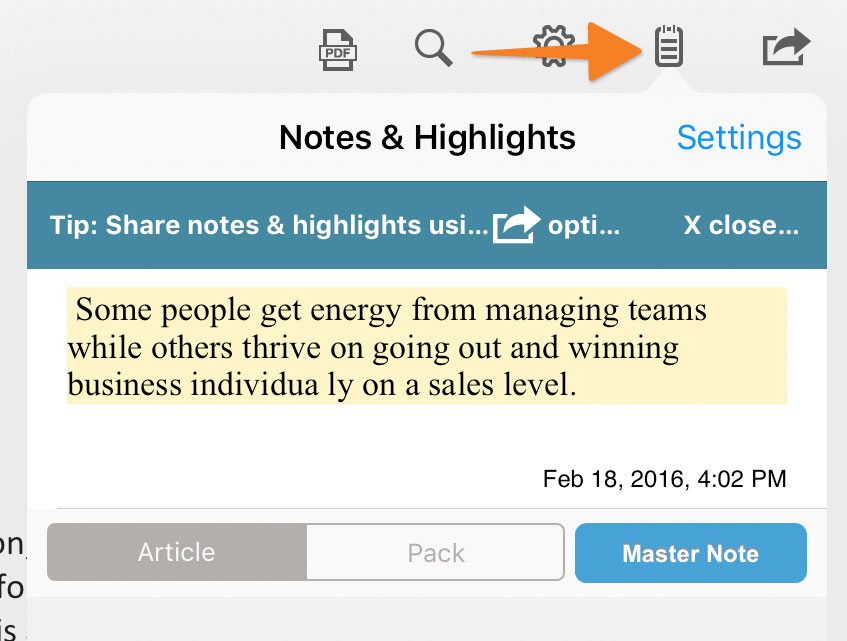
Notes appear in the panel under the text highlight they're associated with.
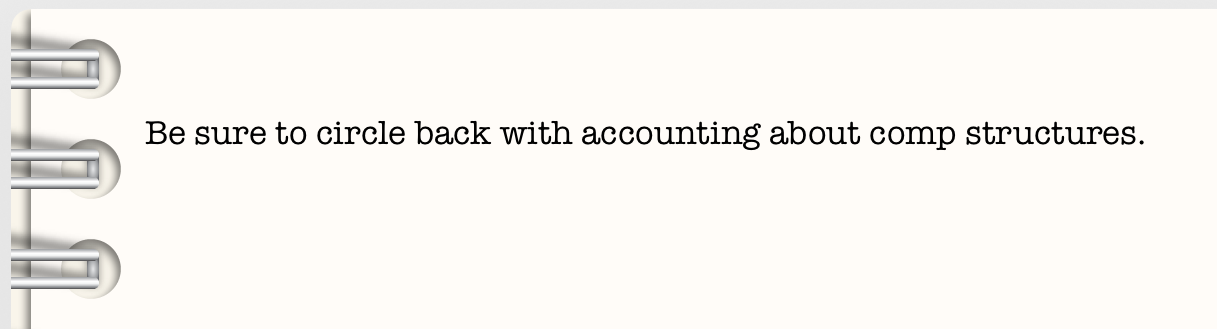
Master Notes
You can also add Master Notes to a pack. Master Notes are different from the regular notes anchored to article content. Master Notes are more of a notebook for you to use in a general way that doesn't mark up an article's content.
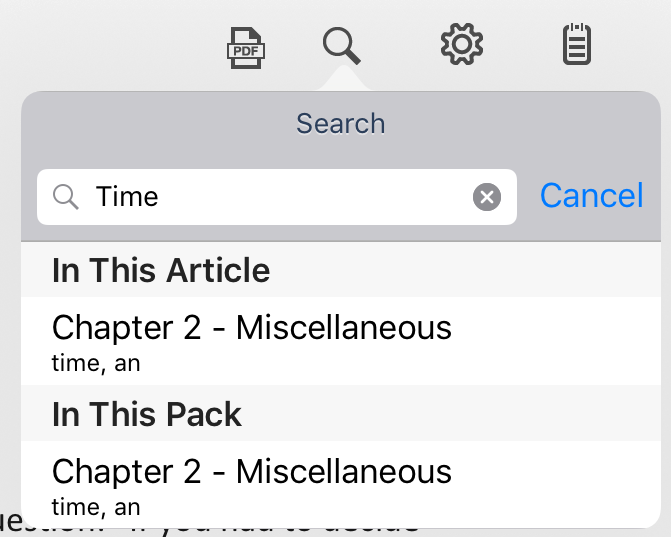
Search
You can also search within the pack you're reading by tapping the Magnifying Glass icon. Enter text and it will find all of the places in the pack where that text occurs, letting you select a result and be taken to that specific section of the pack.
Settings
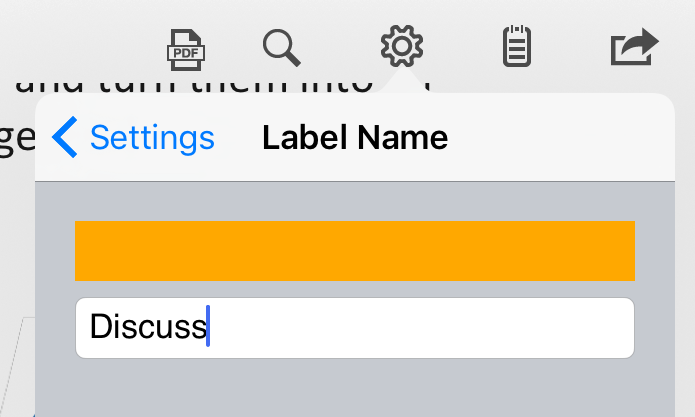
The settings menu provides another option for changing the default highlight color—the next highlight you make will be in the color that you select here. You can also change your Display Nickname—the name that appears on your shared annotations (provided that the sharing option is enabled for this pack).
You can also enter custom labels for specific highlight colors.
Sharing Notes and Highlights
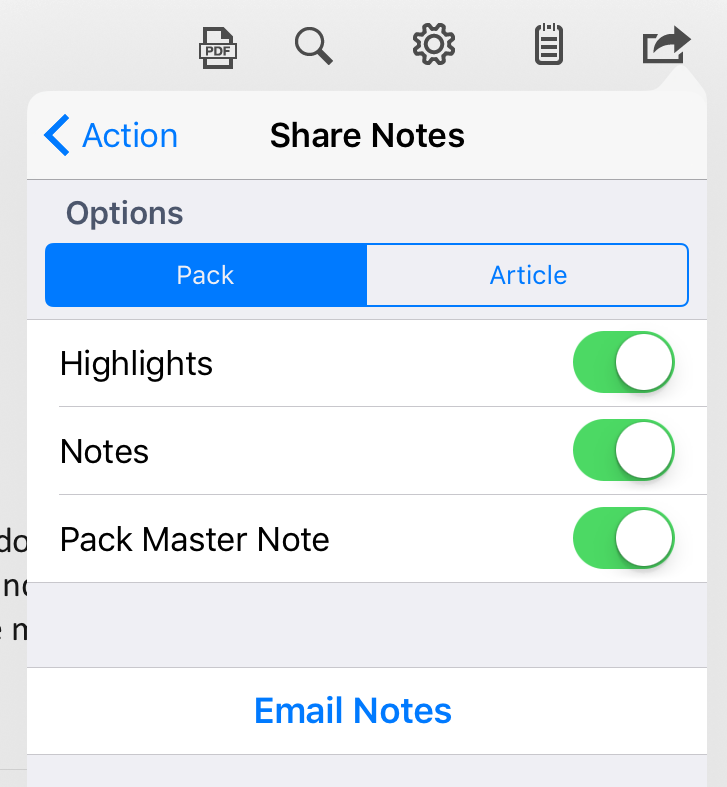
Using the Actions icon in the upper right of the screen, you can choose to share your highlights and notes or import other people's.

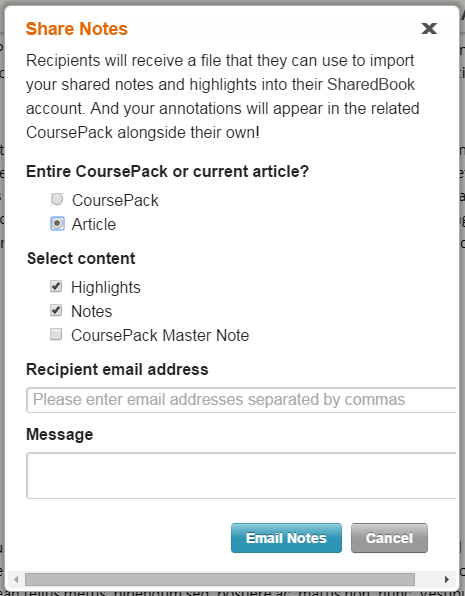
Sharing notes and highlights so colleagues can view them right in their web reader or the mobile app along-side their own notes makes studying in groups a lot easier. From the Actions panel, select Share Notes, then choose whether to share some or all of your Highlights, Notes and Master Notes for the entire pack or a specific Article before sending them via email to another person.
When notes and highlights are shared from a SharedBook account, an email with a .xanedu file attachment is delivered to the intended recipient. Shared notes and highlights can be imported into either the Web Reader or the mobile app. If you're expecting an email with shared notes and highlights and it has not arrived, please be sure to check your email spam folder.
On a mobile device, follow these steps to import notes and highlights:
- Open the email shared notes and highlights email on your tablet device (this step is required to complete the import process)
- You must have your own copy of the pack your colleague took notes in downloaded to your tablet
- In the shared notes and highlights email, tap on the .xanedu attachment icon that's attached to the message
- Choose the option to open the attachment in the SharedBook App
Printing Notes and Highlights
You can also print from the mobile app by selecting the Print option from the Action menu.
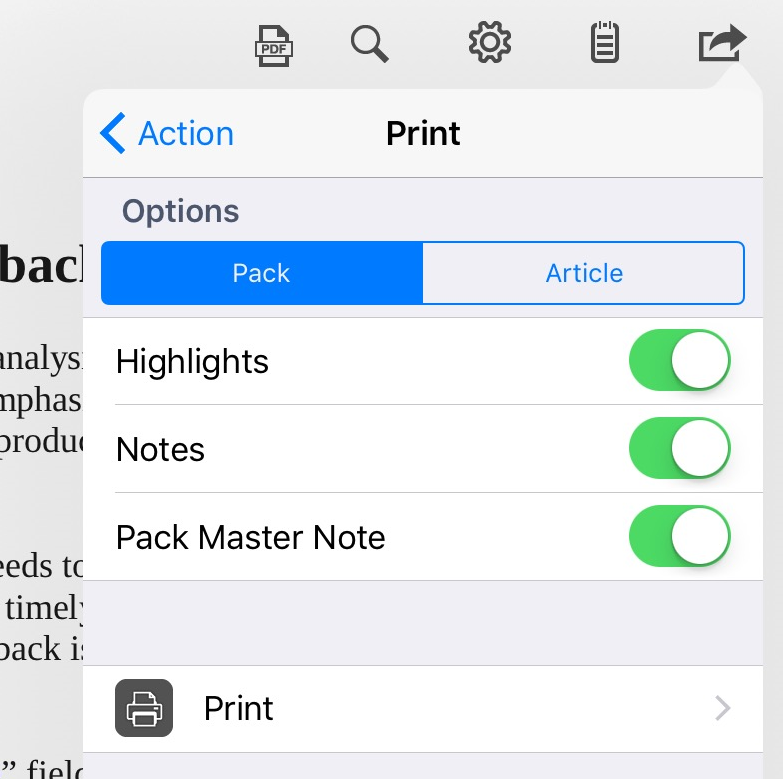
You can either print the entire pack or a specific article. You'll have the option to remove Highlights, Notes and the pack Master Note (and the Article Content if you're only printing one article).
Return to topAccess on a Laptop or Desktop Computer
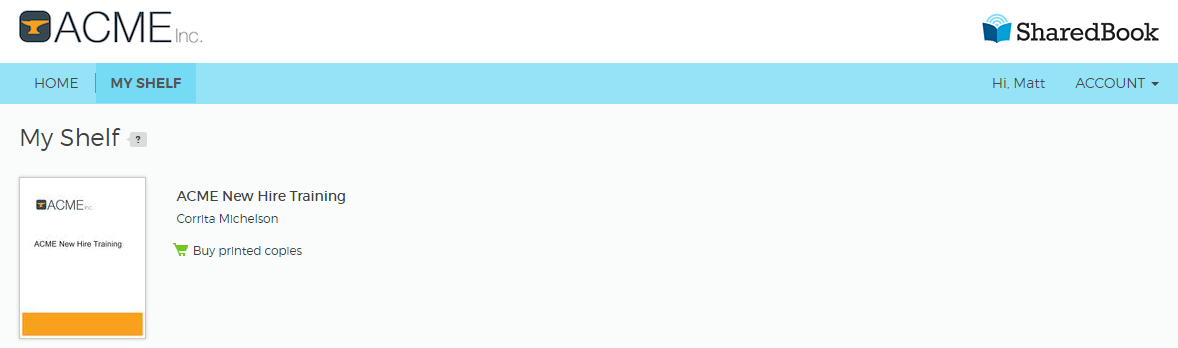
SharedBook works on the latest versions of the most common web browsers (Chrome, Firefox, Safari and Internet Explorer). When you log into your SharedBook account, you'll see all of the packs in your library.
You can select View Pack for the item you want to view. This will launch a new browser window or tab that loads the selected pack, showing you the cover page.
 Return to top
Viewing Packs on a Laptop or Desktop Computer
Navigating the Pack
Navigate to specific articles of your pack using the pack Contents panel. Select the icon on the upper left to open the panel.
In the bottom right of the screen, there are additional QuickNav options to help you jump to different sections of your pack.
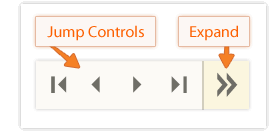
The first four buttons can be used to quickly navigate forward and backward inside the pack. The fifth button on the right will provide more details about the section of the pack you're currently viewing.

Text Size and Margins
The Font/Margin Panel provides options for tailoring the reading experience to your own reading style. For easier long-form reading and improved reading comprehension, choose a comfortable text size and wide margins. For quick scanning, you might prefer a smaller text size and narrow margins.
Search
The magnifying glass button lets you search the article you're reading for specific text.
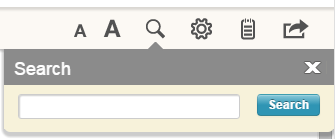
As soon as you enter text, you'll see a list of points in the article using that text. Just select the one you want and you'll be brought to that section of the article.
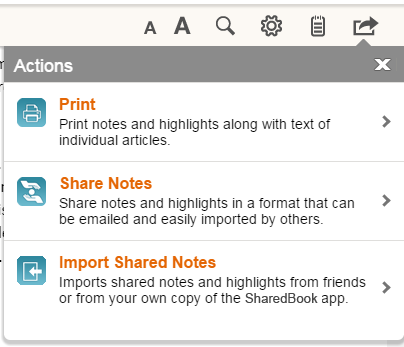
Printing
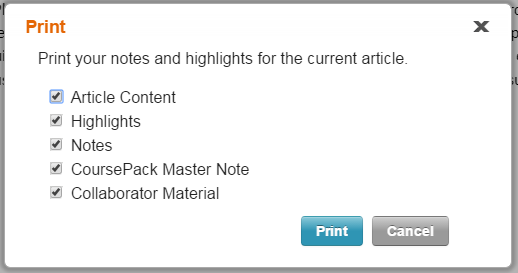
Depending on your organization's SharedBook settings, you may have the option to print pack content. Select the Action icon and then choose Print.
This lets you select which items from the pack you want to print. Once you've selected the items you'd like to print, tap the blue Print button and print your document. Depending on company permissions and settings, printing may be disabled for some or all of the pack contents.
Icon Glossary
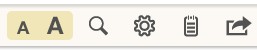
|
Settings | Select this icon to access settings such as highlight color and label. |
 |
Content | Select this icon to view the list of articles in your pack. Select a title to navigate to the first page of the article. |
| Actions | Select this icon to Import Shared Notes, Share Notes or Print. | |
|
Font Size | To change the font size of the pack, click on the small 'A' to decrease the font or the large 'A' to increase the font. |
| Highlights & Notes | Choose this icon to access your pack notes, or to view all notes and highlights. |
Return to top
Working with Notes & Highlights on a Laptop or Desktop Computer
Create Notes and Highlights
To create notes and highlights in the web reader, select text in an article to highlight it. A highlight appears automatically on selected text, tap the highlight to open the highlighting toolbar.
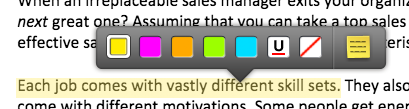
Use the options in the toolbar to change the color of the highlight, or add a note. You can also use the delete option in the toolbar to delete highlights and notes.
Notes and Highlights Panel
The Notes and Highlights panel provides access to all of your notes and highlights—select the icon on the upper right to open the panel.
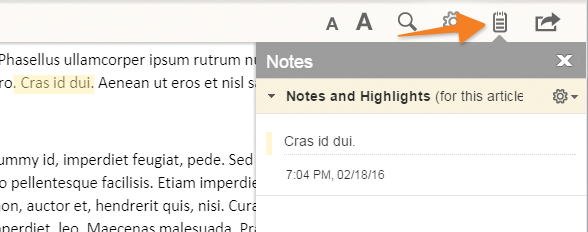
You can click on any highlight in the panel to navigate directly to the highlighted text in the pack. You can also add a note to any highlight in the panel by selecting the Pencil icon beneath the highlighted text.
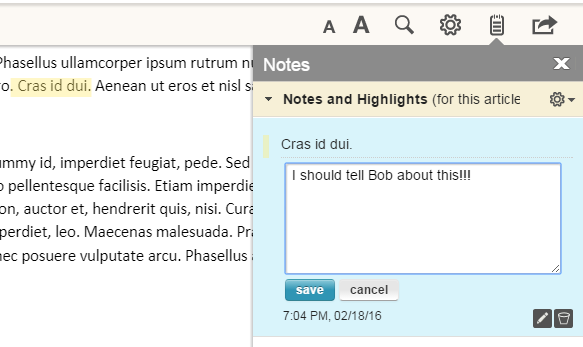
Once you've entered your note, click Save. You can select the Pencil icon at any time to add or further edit the note, or you can delete it by selecting the Trash Can icon next to the pencil.
Note Icons
After a note is added, a note icon will appear on the page next to the highlighted text—click on the note icon to navigate directly to the note in the notes panel.
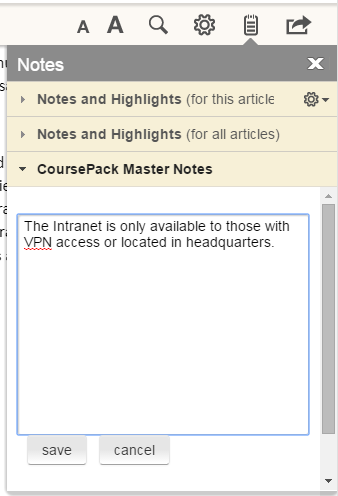
Master Notes
At the bottom of the Notes and Highlights window you can also add Master Notes for the entire course pack. Master notes are different from the regular notes that are anchored to article text. Master Notes are more of a notebook for you to use in a general way that doesn't mark up an article.
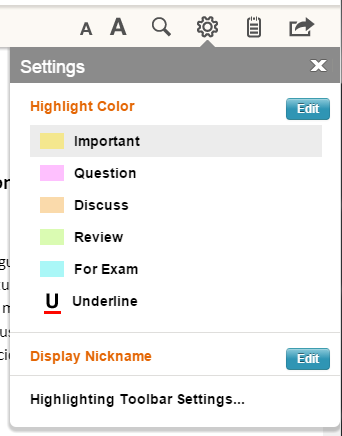
Settings
The settings menu provides another option for changing the default highlight color—the next highlight you make will be in the color that you select here. You can also change your Display Nickname—the name that appears on your shared annotations.
Sharing Notes and Highlights in the Web Reader
Sharing notes and highlights makes studying in groups a lot easier—friends can view them right in the Web Reader or the SharedBook mobile app along-side their own notes. Under the Actions menu, you can Share Notes and Import Shared Notes.
In the Actions panel, select Share Notes and then pick exactly which notes you want to share, enter the email address of the people you want to share the notes with and add a message.
When notes and highlights are shared from a SharedBook account, an email with a .xanedu file attachment is delivered to the intended recipient. Shared notes and highlights can be imported into either the Web Reader or the mobile app. If you're expecting an email with shared notes and highlights and it has not arrived, please be sure to check your email spam folder.
- Save the .xanedu file that's attached to the email message to an easy to locate place on your computer
- Open the pack that you want to import the notes into in the Web Reader
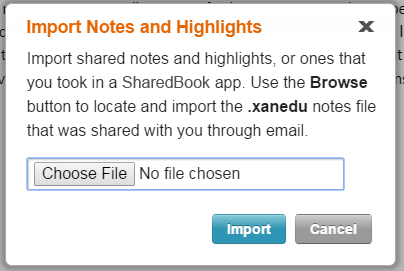
- Select the Actions menu icon in the toolbar at the top of the Reader screen, then choose the Import Notes and Highlights option
- In the Import Notes and Highlights dialog, use the Browse... option to locate the .xanedu file that you saved to your computer, then choose Import
- Your imported notes will now appear in the Notes panel in the pack with which they're associated
 Return to top